- Solutions
-
- File Server: Ransomware Protection
- File Server: File Copy
- File Server: Audit File Access
- File Server: Storage growth reporting
- Licensing/Pricing
- Contact
This help page is for version 10.1. The latest available help is for version 10.2.
OAuth 2.0 requires an application to be registered in an authentication directory, and for Office365 that is Azure Active Directory. This document will walk you through the required steps so you can use Office365 in your PA File Sight installation for sending email alerts.
Note: The below steps are supported in PA File Sight version 8.5 or newer.
If you have multiple installations of PA File Sight, these steps (application registration) must be done for each installation. Installations can NOT share the IDs and secrets that will be granted through this process. If the IDs and secrets are shared among multiple applications or installations, they will log each other out every time the credentials are used (every time an email is sent).
However, you CAN have multiple applications all send through the same Office365 account/email address.
 Hint: Check each item as you go so none are skipped
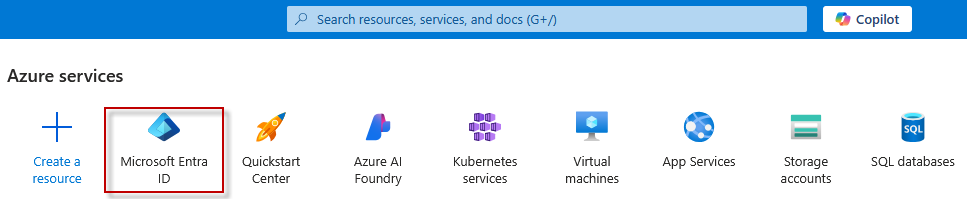
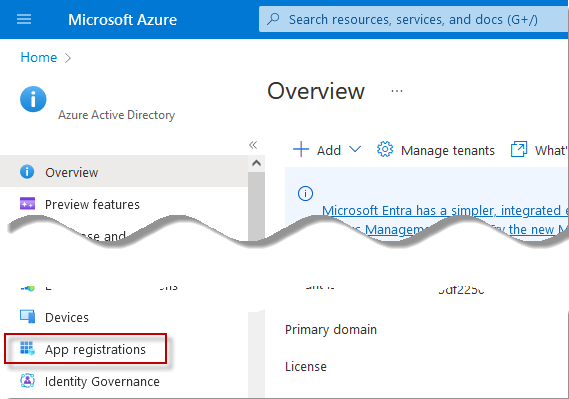
Once you are in Entra ID, click on App Registrations in the menu on the left. It might be under the Manage category.

Give your application registration a name. We recommend including the application name and the server it is installed and what access is being granted. Something like "PA File Sight on SERVER01 for emailing via Office365".


For SMTP:
For POP3:
For IMAP:
The Email Action's SMTP Server Name, Port, and Username for SMTP Server will be the same whether you use OAuth 2.0 or not, and will be available from your Office365 account. Typically these are values such as smtp.outlook.com, port 587, and Explicit SSL/TLS respectively.
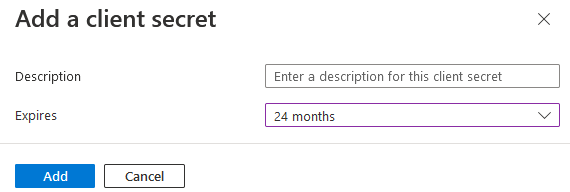
Click the +New Client Secret button and give the secret a name. We recommend making the expiration as long as possible so you will not need to revisit this soon. Currently 24 months is the maximum allowed.

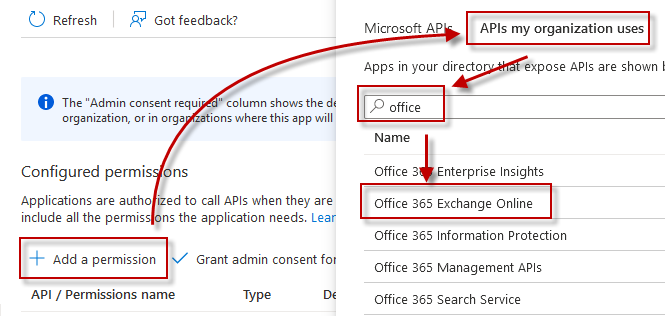

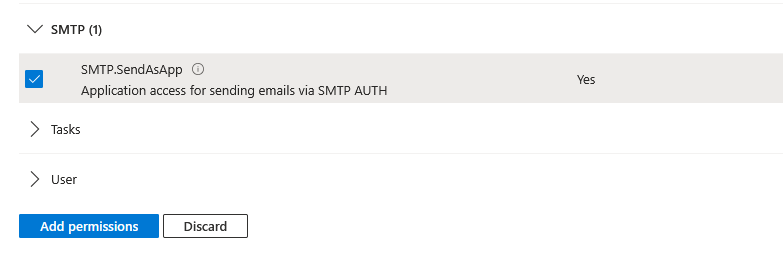
For the Email Action to send alerts, scroll down to the SMTP section and choose "SMTP.SendAsApp"
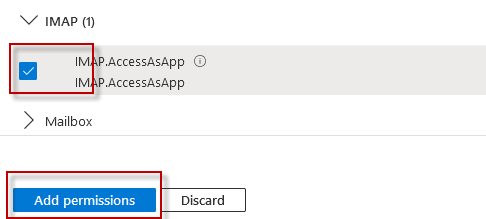
For the Mail Monitor, scroll down and select "IMAP.AccessAsApp" and/or "POP.AccessAsApp" and then click "Add Permissions" at the bottom.
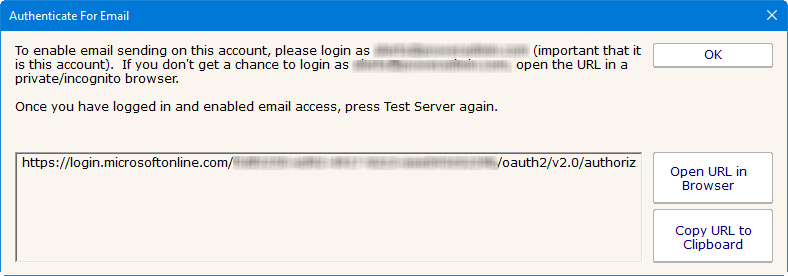
Be sure to login with the target account (the account that will send emails, or the account whose mailbox will be checked).
CAVEAT: Office365/Azure uses cookies to keep track of logged in sessions. If you go to this URL and it immediately forwards you to the OAuth Authentication Complete page, you will have authenticated using whatever account the cookies are tied to, and not necessarily the account that the Email Action will use.
If this happens, copy the URL to a private/incognito browser and login there. This will ensure you authenticate the proper account.
Office365 (Azure) now controls how long the authentication is valid. Every time an email is sent the authentication is checked and refreshed. According to Microsoft documentation, if the internal authentication tokens aren't used for 90 days (i.e. no emails are sent for 90 days) the authentication will timeout. If the Office365 user account's password is changed this can also cancel the current authentication. In addition, we saw above that the Client Secret is only valid for up to 24 months.
If/when the authentication becomes invalid, that is considered a System Error and the new required authentication URL will be shown at the top of reports, and sent out via other notification Actions. This would be a good reason to have a Backup SMTP server configured. Until the newest authentication URL is used to login, email will fail to send.