By Des Nnochiri
For Windows 10 users, Microsoft’s OneDrive cloud storage can add critical backup, sync, and file-sharing capabilities to personal desktops or business networks. In this guide, we offer some recommendations on getting the most out of the service.
OneDrive Basics
A built-in component of Windows 10, OneDrive can back up and sync files from a PC to the cloud, a smartphone, a tablet, or other Windows PCs. File transfer to systems running Android or iOS may also be achieved via the OneDrive mobile app, while file sync with Mac OS systems may be accomplished using the OneDrive desktop application.
Web links may be used to share files for collaboration purposes, with access to Microsoft Office type files (PowerPoint presentations, Excel spreadsheets, etc.) enabled through Microsoft’s free online web apps for users who don’t have Office installed. However, sharing is limited in that collaboration via the Excel desktop client is limited to subscribers of Office 365. The Excel Online, Word Online, and PowerPoint Online platforms also allow for collaboration.
OneDrive for Business is the enterprise version of the service and is intended for users whose organization has an Office 365 enterprise subscription.
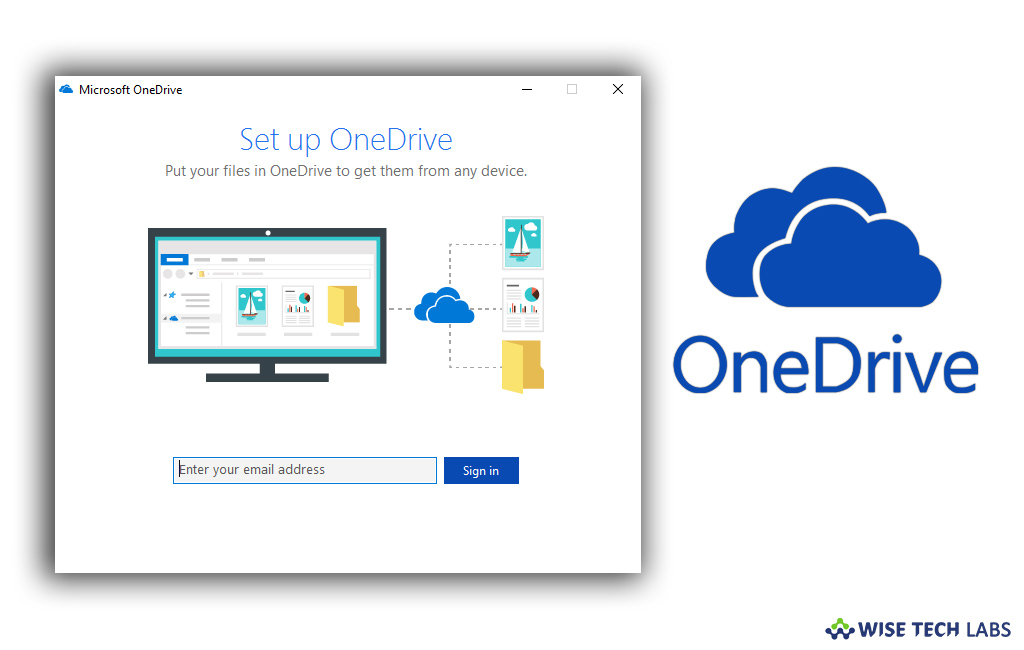
Signing In
OneDrive is activated by default when you log into your Windows 10 PC with a Microsoft user account, which you already have if your organization uses Outlook or if you have a free webmail account at Outlook.com.
Alternatively, you can bypass the login to your Windows 10 system and sign into OneDrive separately with your Microsoft user account credentials. To do this, right-click on the OneDrive cloud icon in the notification area of the Windows 10 taskbar, select Settings > “Account” tab > “Add an account” button. Type your Microsoft user account email address and password into the panel that opens up.
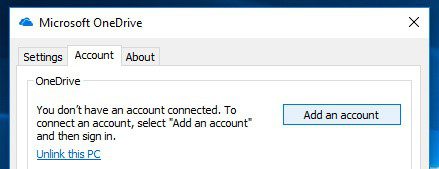
(Image source: Computerworld )
)
Account Limitations
5GB of free storage is available to individual users of OneDrive with a $2 monthly fee for 50GB. There’s a 10GB limit on files that you upload in a single operation. This limit increases to 15GB for business subscribers, who have the choice of paying $60/user/year for 1TB or $120/user/year for unlimited storage.
Using Windows 10 File Explorer to Store and Sync Files
OneDrive displays in the navigation pane on the left when you open the Windows 10 File Explorer. You can save files and documents to this virtual folder from most Windows applications or use drag-and-drop to transfer files from specific folders. Any file placed in the OneDrive directory on your PC is automatically uploaded to the cloud. Synchronization also occurs each time you delete an item from the OneDrive directory.
File sync extends to version control, as OneDrive updates any file in its directory that you make changes to. Any changes made offline are updated the next time you connect to the internet.
(Image source: Computerworld)
All OneDrive files and folders sync to the cloud automatically by default. You can change this setting by right-clicking the OneDrive icon, choosing Settings > “Account” tab > “Choose folders.” Deselect any folders that you don’t wish to have synced automatically from the list.

(Image source: Computerworld)
Default Save Locations
OneDrive creates its own Desktop, Documents, and Pictures folders, which are distinct from the ones on your Windows 10 desktop installation. OneDrive uses these folders as the default locations for saving certain kinds of files each time you log in, bypassing the folders on your hard drive.
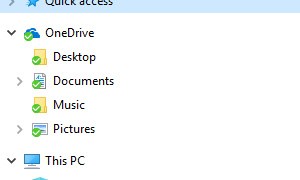
(Image source: Computerworld)
You can synchronize file saving between the Windows 10 desktop file system and OneDrive by right-clicking the OneDrive icon > Settings > “Auto Save” tab > “Update folders” button. Click the “Start protection” button on the screen that pops up, to enable synchronization. If you follow the selection procedure just described and click “Stop protection” on the pop-up screen, this will disable folder synchronization.
Setting Conditions with Files on Demand
If you like to perform backups only on selected files and folders, OneDrive Files On-Demand lets you choose which files should be downloaded from the cloud to your Windows 10 system and lets you upload specific files from the desktop to the cloud without storing them on your hard disk afterward. (This feature dates from October 2017 and the Windows 10 Fall Creators Update, version 1709.)
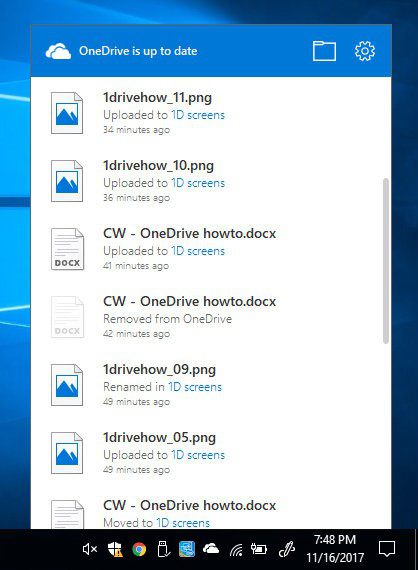
To remove an individual file or group of files from your computer’s hard drive but keep it in the cloud, select then right-click the file(s) and click “Free up space” from the pop-up menu. Clicking the OneDrive icon on the notification area of the taskbar brings up a panel showing files that have been added, deleted, moved, or renamed.
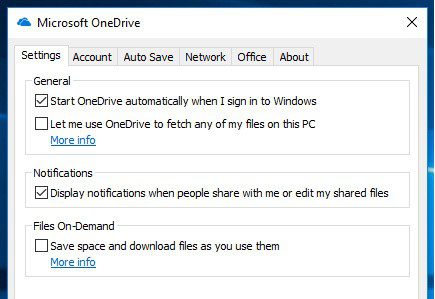
Files On-Demand is activated by default. You can turn it off by right-clicking the OneDrive icon > “Settings” tab > unchecking “Save space and download files as you use them” under Files On-Demand.
(Image source: Computerworld)
Restricting File Sharing
Right-clicking a file or folder from Windows 10 File Explorer and choosing “Share a OneDrive link” from the pop-up menu will generate a URL for the file or folder in the cloud. Copy that link to your clipboard and paste it into an email, Instant Message, or other communication to share the file with others.
If you have a paid subscription to OneDrive, you can password protect your file sharing links and set expiry dates for when they can be used. This enables you to restrict the number of outsiders who can view or download your files. This is a web-based control that requires OneDrive on the web.
To access the service, right-click on the files you wish to protect and choose “More OneDrive sharing options.” Your default browser will open, connecting to your OneDrive account. From the Share panel of the OneDrive web interface, you can set your file sharing restrictions. These include:
- Allow editing: Lets other users work on the documents you share with them. Note that edited files will be synced to the copy in OneDrive on your PC’s hard disk.
- Set expiration date
- Set password
- Get a link: This link will be public, unless you’ve set a password for it.
- Email: This opens a panel where you can type in the email addresses of people authorized to share the file.
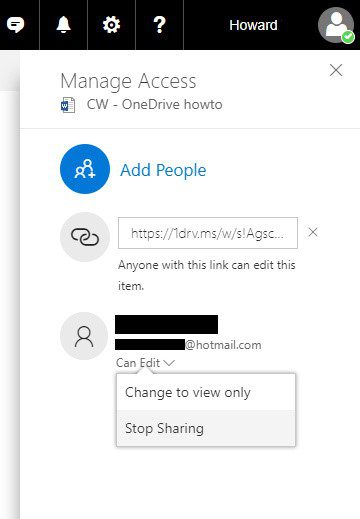
The sharing status of any file in OneDrive on the web may be viewed by right-clicking on it and selecting “Details.” This opens a sidebar on the right side of your browser window, from which you can make changes by clicking the “Manage access” link.
(Image source: Computerworld)
OneDrive for Business
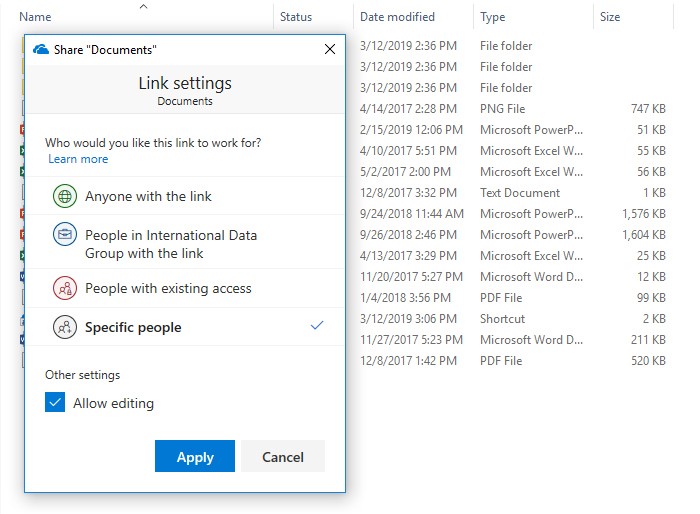
OneDrive for Business provides deeper integration with the Windows 10 File Explorer. Right-clicking on any file or folder pulls up a menu with a “Share” option, which in turn opens a Send Link screen where users can designate who should have access to a file and what permissions they should have. The default settings allow only the people you invite to be able to see and edit a file or folder.
(Image source: Computerworld)
OneDrive with the Windows Store
The Windows 10 File Explorer won’t display any folders from OneDrive that haven’t been downloaded to your local hard drive. Microsoft has undertaken to include this feature in future editions of the platform. Until then, you can use the OneDrive Windows Store app to get a view of all your OneDrive content, including files that aren’t on your local storage drives.