ESXi is a powerful and popular virtualization tool made by VMWare that is used for the deployment and serving of numerous virtual computers. It is used as a standalone operating system and as such uses such components as a kernel. This operating system is the primary component that makes up VMware’s virtualization infrastructure suite.
Pre-Installation
There are certain storage options that need to be configured before ESXi can be installed. For example software raid configurations are not supported and may not be recognized by the ESXi installer. Instead it may see the drives as multiple standalone physical drives. Therefore if you do plan to use RAID configurations then it is important that you stick to VMware’s hardware compatibility list and choose an approved hardware raid adapter.
Getting Started
You will need to look into acquiring a copy of VMware’s ESXi Hypervisor. You can obtain a free copy from VMware’s website after signing up, however the features may be limited. Next you are going to need to decide on how to install ESXi onto hard disk. You have a few options here that may include creating a bootable CD/DVD, bootable flash drive or the option of a PXE network boot. This article will show the option of installing from a bootable USB flash drive. You will need to create a live bootable USB which can be done using a popular tool such UNetbootin.
Initial Boot and Installation
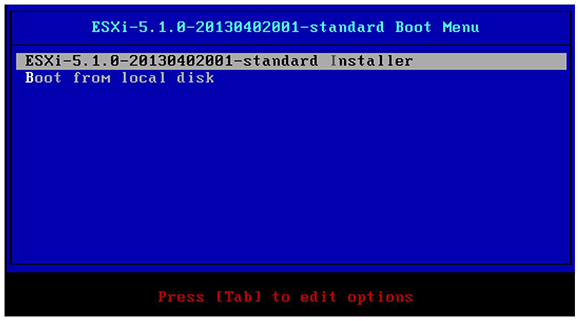
During the initial boot of your device there should be an option to choose either Boot Menu or Setup. If you are unable to see the Boot Menu option then it would be best to choose the Setup option. From here you will need to navigate within the menu of your BIOS select your boot option and choose the USB that you inserted. The first option you will come across once selecting your boot option is the ESXi standard boot menu. From the Boot Menu you should choose the ESXi standard installer of the version that you wish to install. ESXi will then load until the installation is ready to begin.
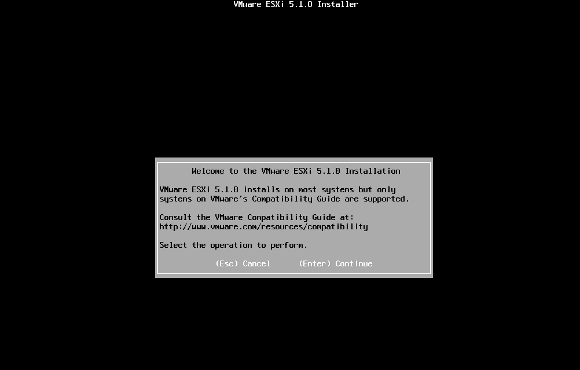
ESXi’s first installation message prompt will be as the image below and ask if you wish to continue or exit. Simply hit Enter to begin working through the installation options.
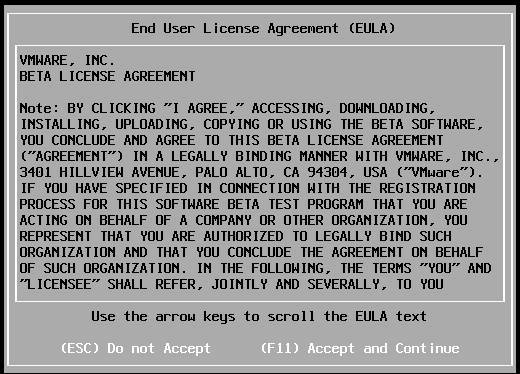
After hitting Enter you will then be prompted to read and accept the EULA by pressing F11 before proceeding with the install.
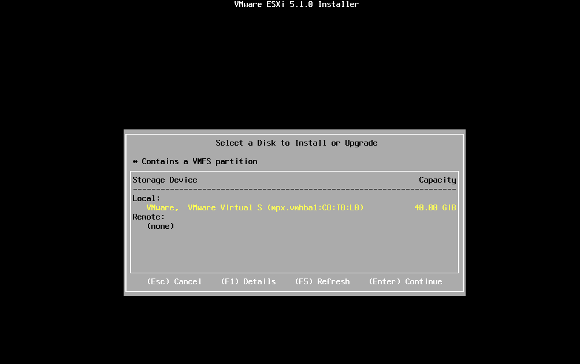
The ESXi install will then scan the current system for available disk groups. From here you can choose the disk that you wish to install ESXi on. After confirming this, hit Enter to continue onto the next prompt.
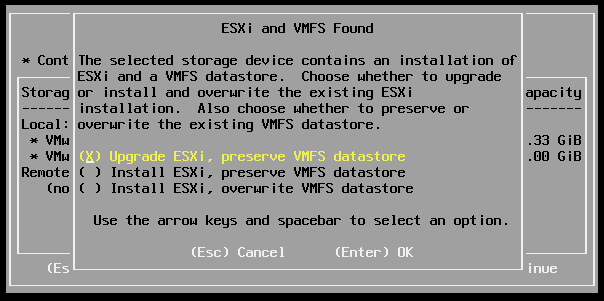
If there is a previous installation of ESXi found on the hard disk then you may be asked if you wish to Upgrade or Install while either preserving or overwriting the VMFS datastore. As this installation is intended to be a fresh install, choose the Install Esxi and overwrite VMFS datastore option with spacebar and then enter to proceed to the next prompt.
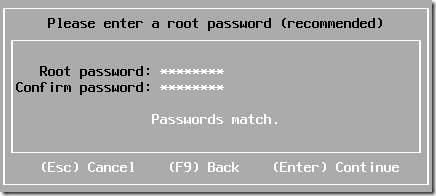
Before the installation begins you will be asked to enter a root password that will be used for administering your EXSi install once complete. This is important for any configuration changes so it is important to record this login.
Once finishing with the before mentioned configuration options you will be asked to confirm the install. Ensure that the install states the correct drive that you wish to have ESXi deployed to and press Enter. From here you will receive the installation status bar until the install is complete.

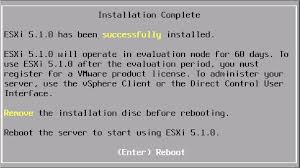
Finally you will be met with the prompt displaying that ESXi has been successfully installed. If your boot order is set up so that your install device will be reached before the hard disk then it is important that you remove the installation media first before rebooting.
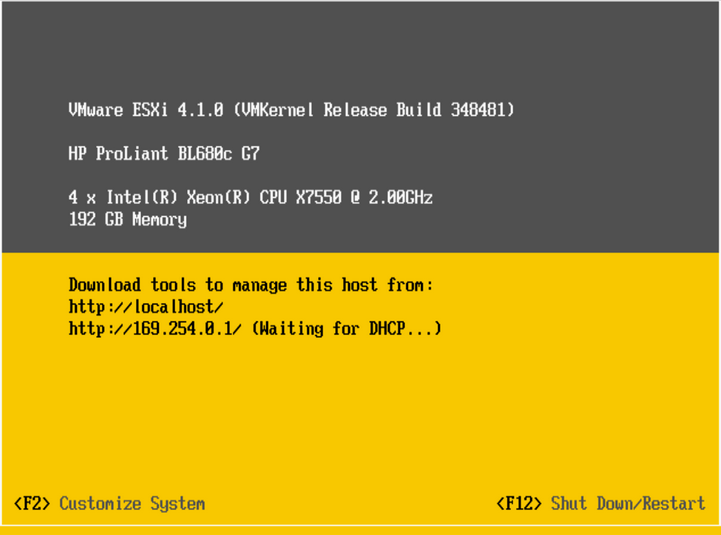
After rebooting you will be greeted with the initial ESXi screen. If you have DHCP enabled on your network device then ESXi should already have received an IP address however you may wish to manage this manually. You can do this by pressing F2 to customize your system.

Once here choose the option to Configure Management Network and you will be able to manually enter an IP address. Once done make sure to confirm your option by pressing Enter.
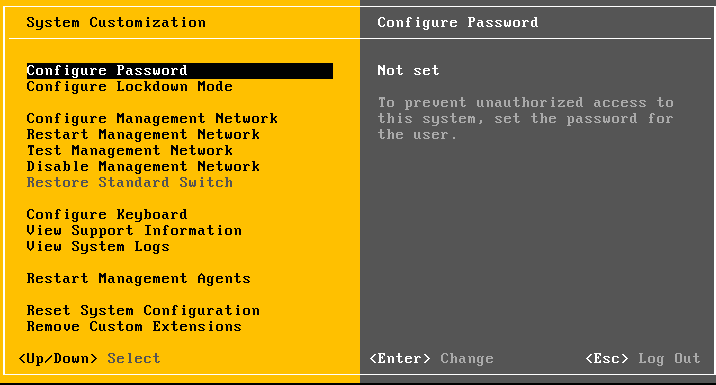
You can then choose the option Test Management Network and ensure that your network settings are configured correctly. After this press Esc to logout and return to the main ESXi screen.
The main screen will show the IP address that was assigned either statically or via DHCP and this IP is used to access the VSphere download which to manage this host from. Enter these details into a web browser of a desktop that you wish to manage this ESXi host from and download the required VSphere software.
Once installed you may begin using VSphere to manage your ESXi host by first entering the IP Address as shown on your ESXi host, followed by the username and password that was setup during the install.
Post Installation
From here you are ready to start using a fresh install of VMWare’s ESXi. For general purpose use the ESXi hypervisor will be enough to get you started into the world of virtualization. Certain functions may be limited however it will give you the chance to deploy, configure and manage virtual machines.
Joel Fernandez
Joel has over 12 years experience in the IT industry, specialising in virtualisation, networking and management of infrastructure. He is a senior consultant at Cloud Business Technology.