With the expansion of the Internet and the development of new technologies, VPN or Virtual Private Connections has become an important factor in all enterprises. This technology allows companies to interconnect different networks that are geographically separated to provide one massive intranet. Another important aspect is that VPN connections allow remote users to access internal networks using a secure channel. With these ideas in mind we can begin by saying VPN connections offer reliable, secure and fast communication channels.
One slight inconvenience can come from internet connection bandwidth, but this should not be a problem since internet connections have evolved to high speeds. In this article I will show you how to configure VPN connections on a Windows Server 2008. Note that companies usually prefer dedicated equipment for establishing such connections, but this technology is also available with Windows Server editions.
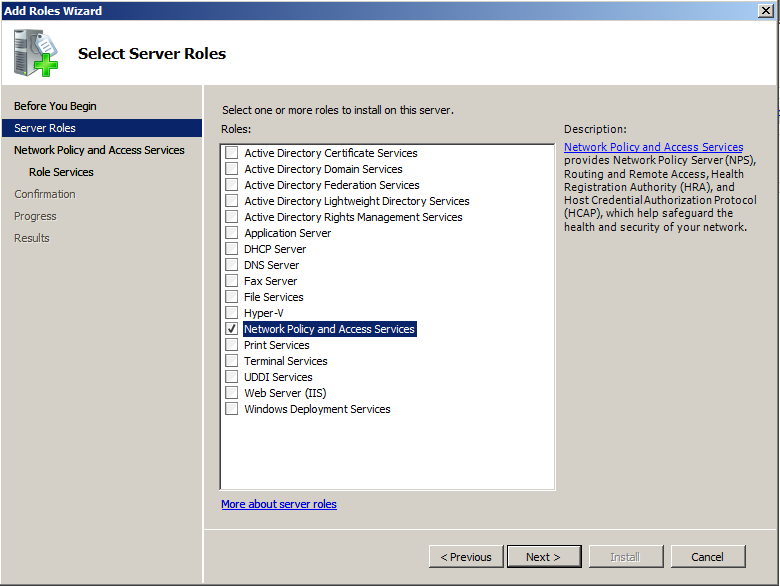
To successfully configure a VPN server we will need to make sure that some requirements are met. First, ensure the server is using two network interfaces, one connected to the internal network and the other one connected to the Internet. The public interface will be used to accept incoming VPN authentication requests while the internal component will forward packets using the external network adapter to the internet, thus creating a flow between these two sides. We will need to add the Network Policy and Access Services role to our Windows Server 2008 machine:
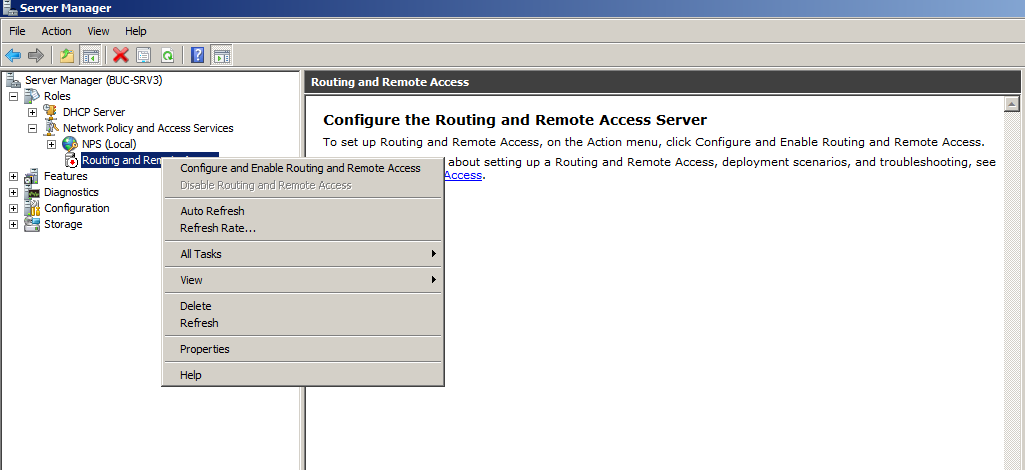
Once the server role has been added, open Server Manager Console, right click on Roles/Network Policy and Access Services/Routing and Remote Access and select Configure and Enable Routing and Remote Access:
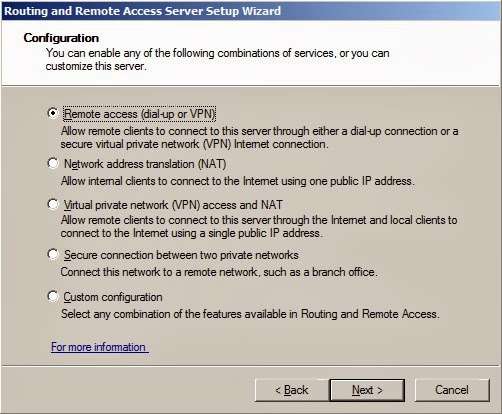
Read the welcome screen, then proceed to the next step by clicking Next. In the next section select Routing Access (dial-up or VPN). There is a short description underneath this section saying that you can allow remote clients to connect to this server through either a dial-up connection or a secure virtual private network (VPN) Internet connection:
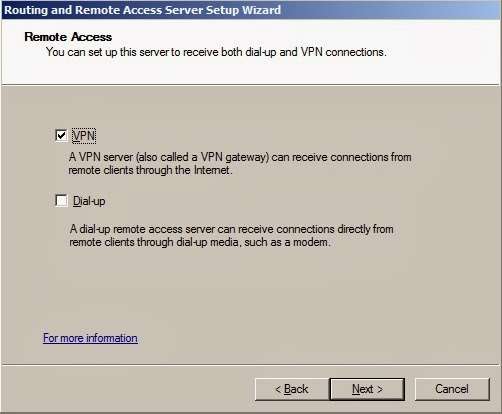
Since we will be using a VPN connection make sure to check the button from the following section and then click Next:
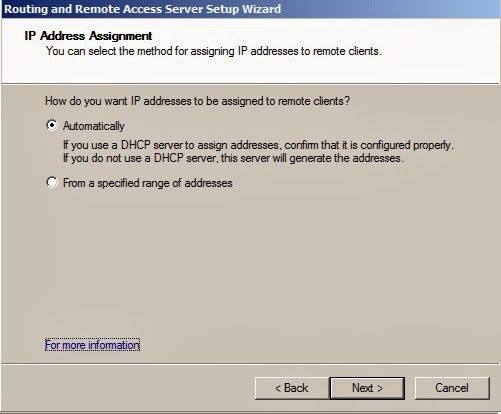
You’ll need to select what network interface connects the server to the Internet. This interface will be used to receive VPN connection requests and packets will be forwarded from and to this hardware device. When configuring a VPN connection, you’ll also have to specify how the remote users will receive their IP configuration. If your network is using a DHCP server, select the first option. Otherwise select the second one and configure an IP scope manually:
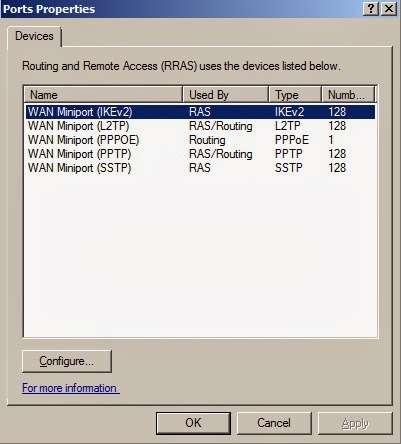
Select the option that suits you best and proceed with the installation. Once the wizard is complete open the Network Policy and Access Services console. In the Ports section you will be able to add or remove connection ports. These are used by each VPN client to establish connections to our Windows Server. By default, Windows VPN Servers create 128 ports for each connection type (SSTP, L2TP, IKEV2, PPPOE and PPTP). If you right click on the Ports section and select Properties, you can configure ports for each connection type:
What VPN technology you choose to use depends on the network requirements, the local infrastructure, available equipment and internet connection bandwidth. All of these things need consideration when choosing a VPN connection type.
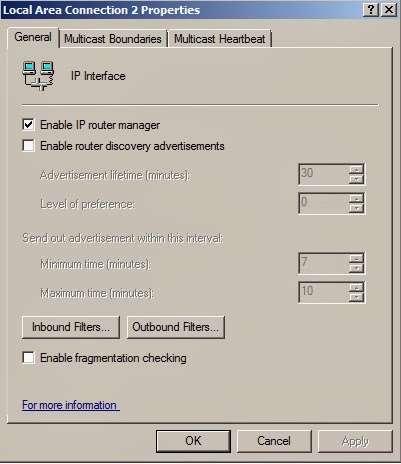
Navigate to IPv4/General menu and double click the network interface used to accept incoming VPN connection requests:
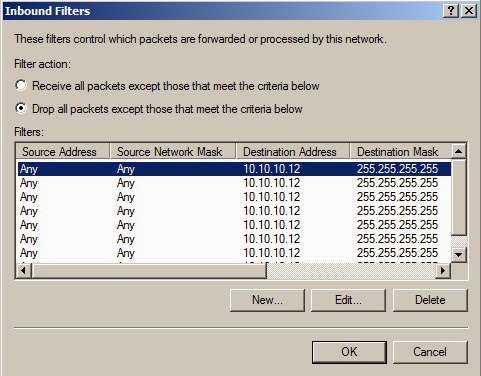
From this section we can configure inbound and outbound filters. The VPN server will automatically configure inbound filters for accepting VPN requests:
By filtering incoming and outgoing requests you can ensure that only computers and clients that have permissions are allowed through the VPN server. From the same console you can view active VPN clients and configure Access Logging & Policies. The console is easy to use and offers all the important features for your VPN server.
That’s it for this article folks, hope you’ve enjoyed it. For any questions feel free to access our comments section and I will respond as soon as possible. Don’t forget to check out other articles from our blog and stay tuned for following posts. Wish you all the best and have a wonderful day.

