
By now we’ve learned about the main principles behind DirectAccess, its features, how to install it and we’ve started configuring it on a Windows Server 2012 box. I’ve previously pointed out that there are four main steps that needs consideration in order to successfully deploy DirectAccess, we’ve completed the first one in the last article and today we’ll continue with the rest. Please make sure to read the previous articles before proceeding further because by now you should have deployed and configured a portion of the DirectAccess infrastructure.
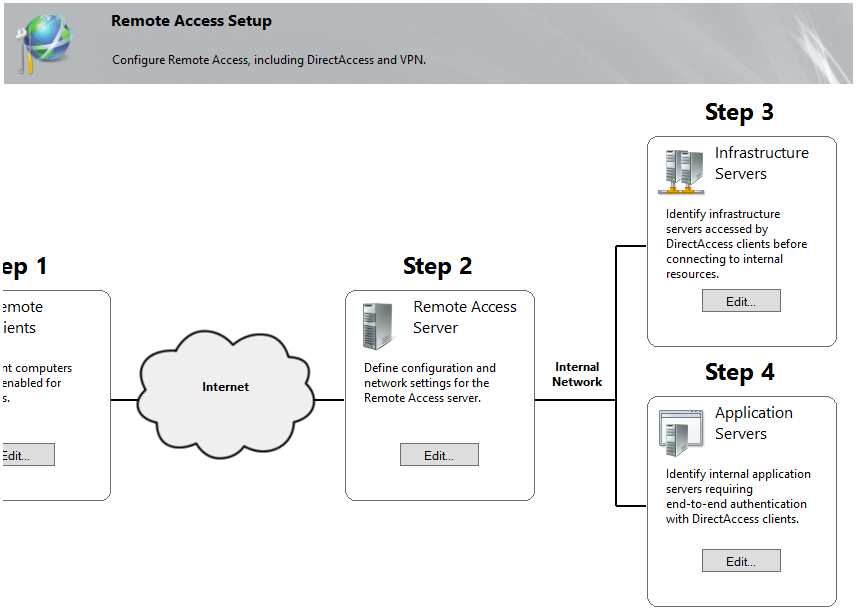
We will now proceed with the remaining steps of our DirectAccess deployment. In the following phase of our configuration we’ll need to setup the Remote Access Server. Once you click on the Edit button from Step 2 of the DirectAccess map, you will be presented to the following wizard:
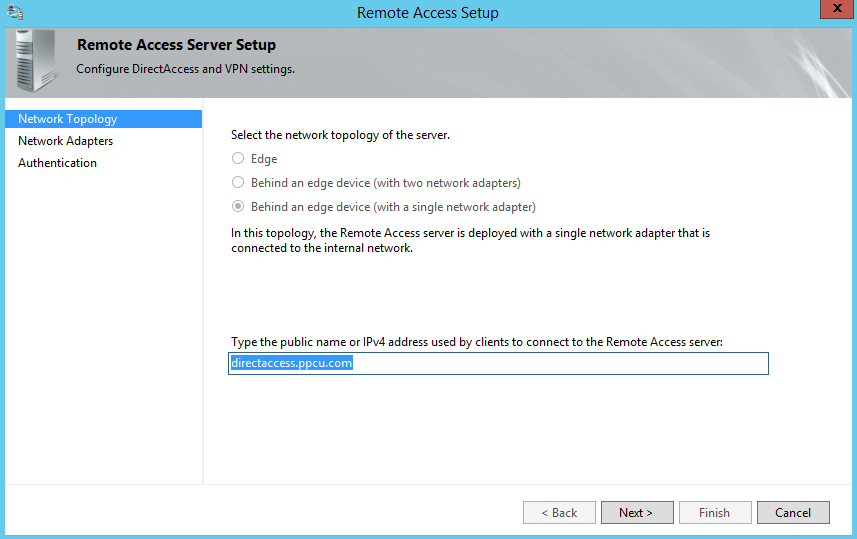
Add the public DNS name or the IP address of your Remote Access Server. Note that my DirectAccess server is located behind an edge device (my router who’s performing NAT) and it’s deployed with a single network adapter so I’ll chose the appropriate option.
In the following window we’ll have to set the network interface that is exposed to our private network. Note that DirectAccess uses computer certificates to authenticate IP-HTTPS connections, you can either use a self-signed certificate or deploy one from your local CA (Certification Authority).
The last page of the Remote Access Server configuration wizard, deals with how DirectAccess clients authenticate with the server:
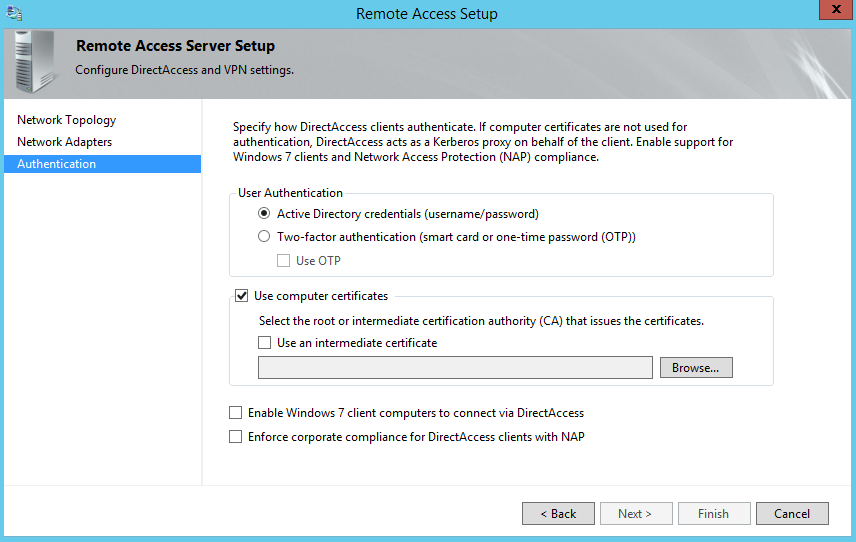
- By default, User Authentication is performed by supplying the Active Directory credentials (username and password). In this scenario, the Remote Access Server acts as a Kerberos proxy to forward requests to the closest Domain Controller (DC) available on behalf of the client.
- You can also opt for two-factor authentication which adds an extra authentication mechanism in which users have to provide an OTP (one-time password) or insert a smart card. OTP can be provided from a RSA SecurID but those require extra deployments such as PKI and RADIUS servers.
- If you opt for DirectAccess authentication using computer certificates, you’ll need to select either the root or the intermediate CA certificate.
- By default, Windows 7 clients will not be able to connect to a Windows Server 2012 machine so make sure to check that box if it’s required.
- As an extra security layer you can enable NAP enforcement over DirectAccess.
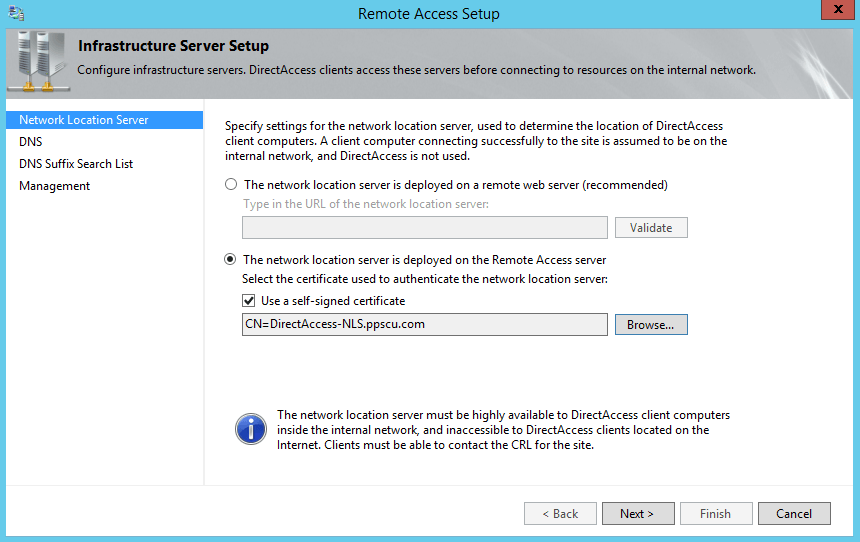
Once the Remote Access Server has been configured, it’s time to proceed further with step 3 that deals with Infrastructure server setup:
On the first page of the wizard you will have to specify the network location server. You can opt for a remote web server or use the Remote Access server (with a self-signed certificate for authentication). As we’ve mentioned in a previous article, the network location server is used by DirectAccess clients to determine if they are located within the enterprise network or connected directly to the public Internet:
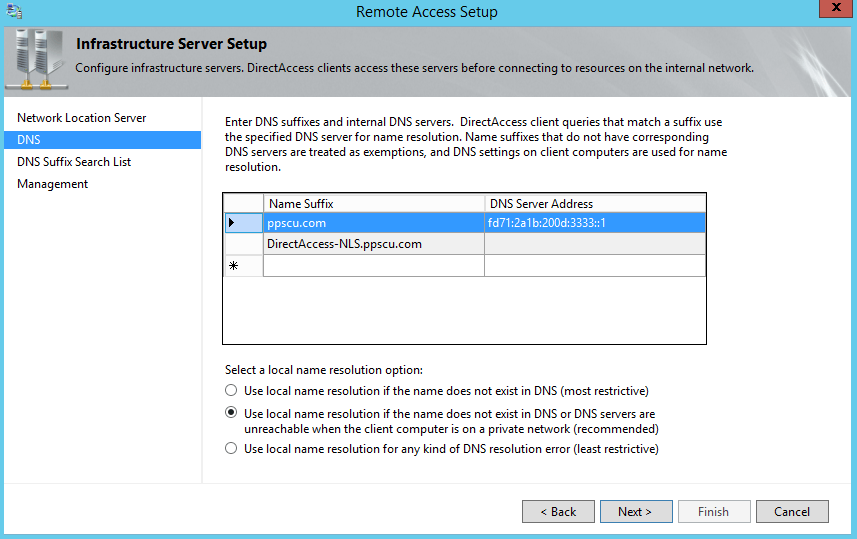
You can add the name suffixes and the associated DNS servers that are authoritative for a particular domain in the DNS page of the wizard. This basically builds a table that informs DirectAccess servers what DNS server should be queried for a particular domain name. This table is also known as NRPT (Name Resolution Policy Table) which is written into the GPOs and applied to the DirectAcess clients. In this section you will also have to configure the local name resolution behavior that will be used by clients. It’s recommended that you use local name resolution if the name does not exist in DNS or the DNS servers are unreachable when the client computer is on a private network. By selecting this option, you ensure that if DNS servers are not responsive for whatever reason, their names and IPs are not leaked through local name resolution:
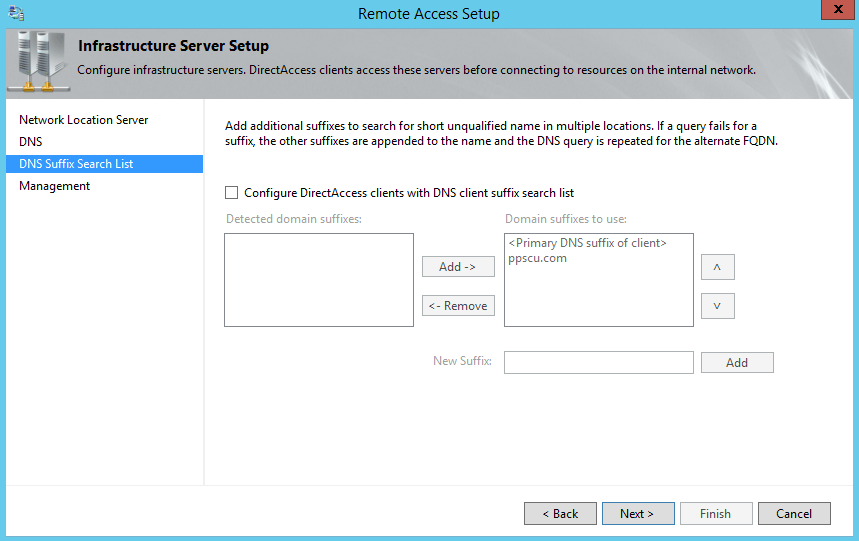
In the following section is where the ordered search suffix list can be created. This option allows clients to query for single-label DNS names. The host will then append each suffix (in the order they were added here) to search for a particular DNS name:
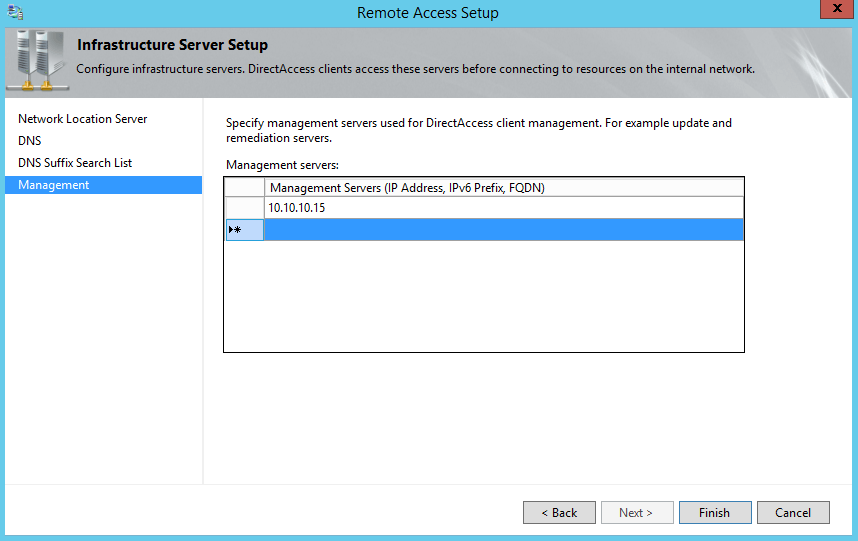
In last page of the wizard we specify the management servers that cannot be detected by DirectAcess clients. I’m saying only “servers that cannot be detected” because DNS can be used for example, to detect Domain Controllers or SCCM servers. Servers that can be added here may include third party update software or antivirus. You can add the FQDN, IPv4 or IPv6 address of these machines:
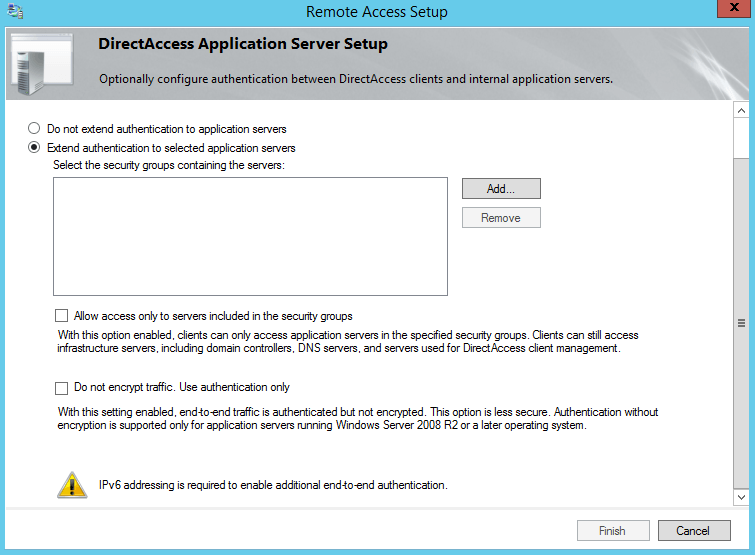
We’ll finish our DirectAcess configuration with Step 4 in which we can optionally specify application servers if end-to-end authentication and encryption is needed. By default, DirectAcess provides these two security mechanisms between the client and the server. If you want to extend authentication and encryption further, you can specify them within this section. Optionally, you can restrict access only to the servers specified here or use only authentication without encryption. Note that if you choose to extend authentication to other application servers, IPv6 addressing is required:
Now that the final step has been completed, we can view the configuration summary by accessing the right section of the DirectAcess console. All these settings will be applied to the clients once you click the apply button:

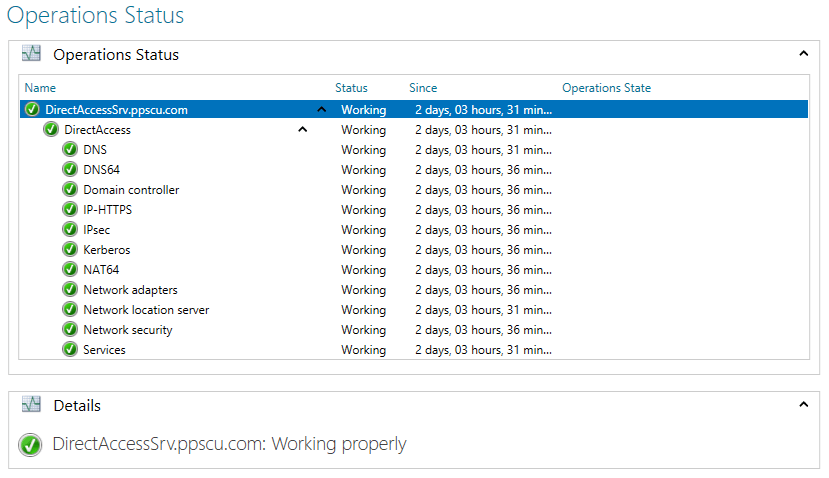
Additionally, you can opt for enabling multisite deployment and/or load balancing. We’ve discussed about these two features in the first DirectAcess article so there’s no need to explain them here. In the operations status page you can verify if your DirectAcess infrastructure is operating accordingly. If any issues occur, they will be thrown here:
If you’ve followed all these steps in this order, you should now have a working DirectAcess infrastructure. All that’s left to do is to test the connection using a DirectAcess client that’s connected through an external line. I’ve tried to explain each step required so you have a better understanding of this technology. If you still have any misunderstandings please don’t hesitate to post a comment in our dedicated section and I’ll try to respond as soon as possible. Hope these articles were well written and you now have a clear overview of DirectAcess. Wish you all the best and stay tuned for the following articles.