

In this article we will discuss some of the DNS settings that each workstation must be configured to in order to communicate within a computer network. DNS is one of the most important services that run within a network or even in the Internet. The infrastructure of the Domain Name System can differ from one dedicated Server to a complex network. If you don’t know all the concepts behind this service, you should check out some of the previous articles from IT training day . I won’t take time describing this service here, so instead let’s focus on the elements that need to be configured on a DNS client.
Each computer network is based on the Client-Server model. In this concept the client will request data from the Server. If the information is found on the Server then the client will receive a direct response with the desired information. This is basically the same way in which the DNS service works. The client will request for a name resolution (getting the IP address from a name) and the Server will either respond with the desired information or it will redirect the request to another DNS Server that is authoritative for the specified domain. Usually, inside large networks, the DNS settings are configured automatically using DHCP servers.
There are some cases in which static IP addresses are used within a network so all these DNS settings must be configured manually. As an example, it is recommended that each Server should have a static IP address instead of using a DHCP server to eliminate the single point of failure. Also, inside networks where there is no AD infrastructure and no DHCP servers, DNS settings must be configured individually.
To configure the DNS servers list that will be used by a client, you must open the TCP/IP settings window from the adapter settings. First, navigate to Control Panel\Network and Internet\Network and Sharing Center and click on the Change adapter settings. Now select your network interface, right click and select Properties. From the Internet Protocol Version 4 (TCP/IP) properties box select advanced. In the DNS tab you can specify the DNS servers in the order of use:
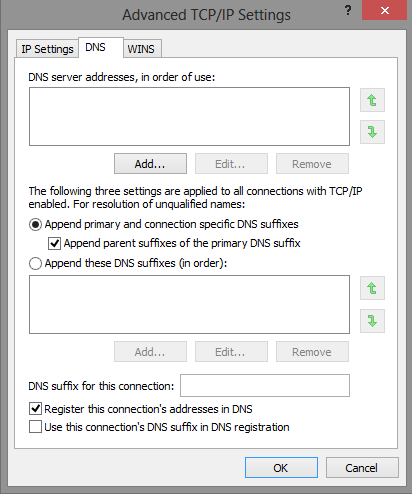
Add the IP address of each DNS server that will be used by this particular machine for DNS queries.
The FQDN, or the fully qualified domain name, is composed of two sections: the hostname and the DNS suffix. You can view the computer’s name by typing hostname in a command prompt:
![]()
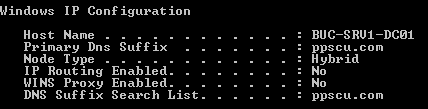
If your machine is joined in an Active Directory infrastructure, then the DNS suffix will be added automatically to each machine. The suffix will specify the domain in which the client has been configured. The whole FQDN will identify that particular machine within the specified domain. If you type ipconfig /all you will see the configuration of these two DNS elements:
The primary DNS suffix has two main functions:
- The client will automatically register his host record in the DNS zone specified in the primary suffix. All other devices within the zone will be able to resolve the host’s name.
- All DNS queries can be made without specifying the suffix. For example, if I search for the buc-srv1-dc01 machine within my private network, the DNS resolver will automatically append the suffix:

If you want to add a DNS suffix to a computer that is not part of an Active Directory infrastructure, navigate to System Properties, open the Computer Name/Domain Changes page and click on more:

Let’s return to the DNS page from the TCP/IP properties panel. If your computer is using multiple network interfaces to connect to other devices, you can specify what particular DNS suffix should be used for a connection:
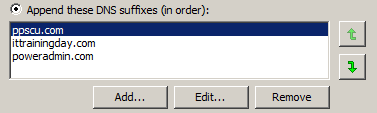
By default, any Windows machine will append the parent suffix of the primary DNS suffix when querying for specific resources. The workstation can also be configured with an ordered list of DNS suffixes that will be used in queries. The client will first query for a resource using the first entry from this list. If name resolution is not successful, it will append the second suffix and so on. Remember that the client will query devices using the suffixes in that particular order:
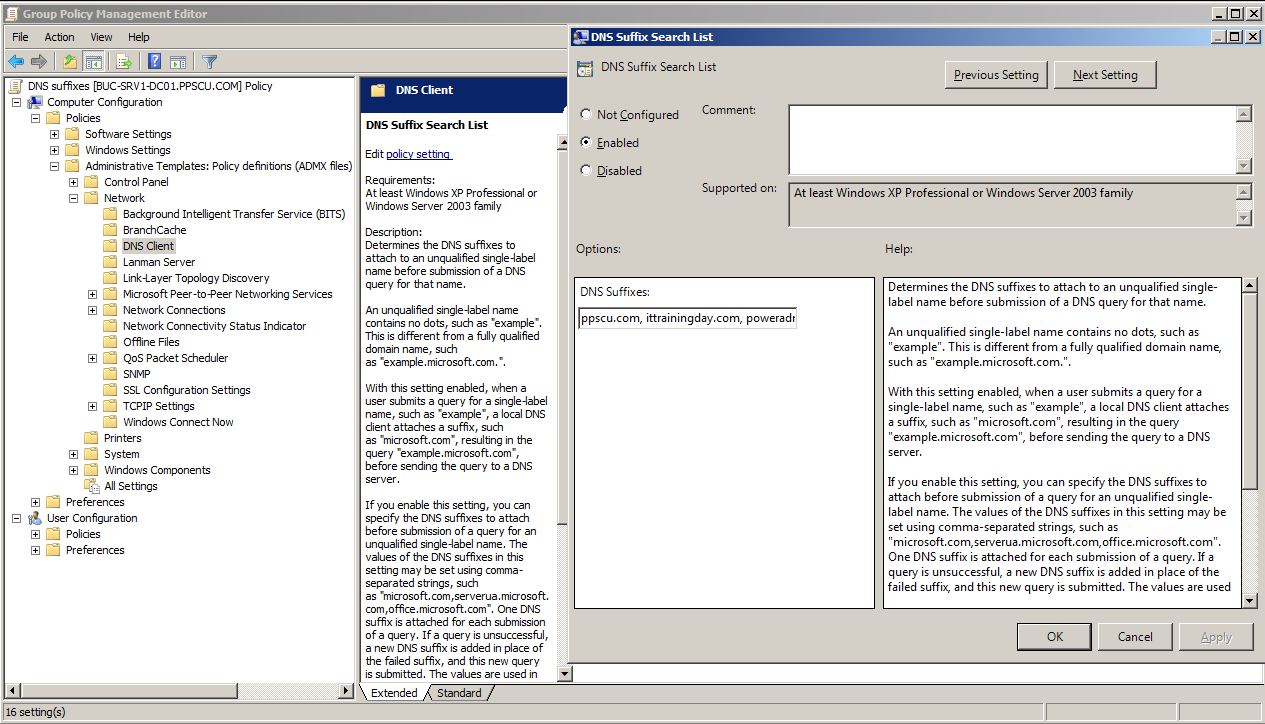
The same settings can be configured using group policy objects. Open the group policy management console and create a new GPO. In the Group Policy Management Editor navigate to Computer Configuration/Policies/Administrative templates: Policy definitions (ADMX files)/Network/DNS Client/DNS Suffix Search List:
By default, Windows clients will be automatically configured to register their A, AAA and PTR records with the preferred DNS server. Clients will register their records if the following conditions are met:
- A primary DNS suffix must be configured on the client either by using AD domain registration or manual registration on the host
- The preferred DNS server that is configured either by DHCP or manual configuration, must host a primary zone that is the same with the primary DNS suffix on the host
- The DNS server on which the registration is made must have dynamic updates enabled (it is recommended that you allow only secure updates from computers that are part of the domain)
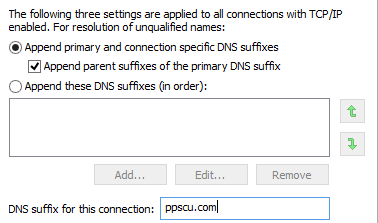
Because I’m using a DHCP server for my client, the DNS suffix is inherited and the registration is made automatically. As you can see from the image below, there is no “DNS suffix for the connection” configured:
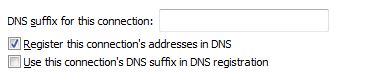
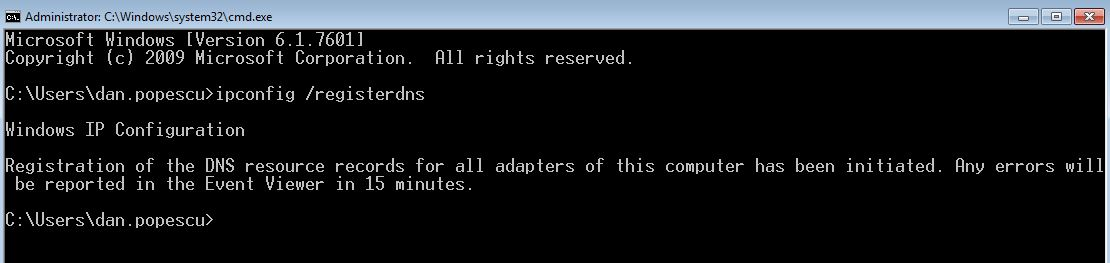
Make sure that the “Register this connection’s addresses in DNS” checkbox is enabled to allow the localhost to register its records with the DNS server. You can also force this registration by typing ipconfig /registerdns from the command prompt:
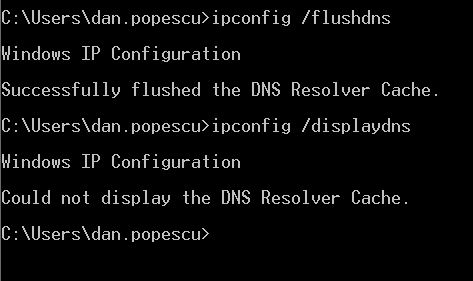
Before ending this article I’d like to talk a little bit on how you can interact with the local DNS cache. Hopefully, you now know that each client holds a local “cache” in which resolved names are stored for a specified period of time (TTL). To view this cache on a Windows client type ipconfig /displaydns and to empty the cache type ipconfig /flushdns:
Once you’ve configured this, check out DNS monitoring with our server monitoring software also.
I hope you’ve enjoyed this article. If there are other things that you feel could be mentioned here, don’t hesitate to leave a comment. Wish you all the best and stay tuned for more articles from Poweradmin.