- Solutions
-
- File Server: Ransomware Protection
- File Server: File Copy
- File Server: Audit File Access
- File Server: Storage growth reporting
- Licensing/Pricing
- Contact
You will find that PA Server Monitor is very easy to set up and use. This guide shows you every step that you will follow when setting up PA Server Monitor for the first time.
PA Server Monitor initially installs itself like many Windows software programs.
The entire installation process consists of two major parts: program installation, and program first time setup.
First Time Setup is triggered when PA Server Monitor is run for the first time, after program installation. It is a configuration process that guides you through the selection of the best choices for the network devices that you wish to monitor.
When you launch the executable file that you downloaded for PA Server Monitor, you will first see a screen that looks like this:
After you select Next, the following screen will appear:
You must review the End User License Agreement and use this screen to indicate your acceptance of the license before the installation process will be permitted to continue. If you agree, select the "I accept" button and then select the Next button.
In this screen, you must select the directory where the files for PA Server Monitor
will be written. The directory will be created for you if it does not exist already.
The most common setting for this (which the installation program fills in automatically) is
C:\Program Files\PA Server Monitor. Select Next once you have chosen a suitable directory.
There are two optional settings available at this time. You may choose whether or not you would like a desktop icon for PA Server Monitor to be created. You may also choose whether you would like the Microsoft SQL Server Native Client Library to be installed, in order to support Microsoft SQL Server as the backend database for PA Server Monitor. You can skip installing the Microsoft SQL Server Native Client Library and do it later. Just run the sqlncli.msi that will be copied into the product's installation directory.
When you have chosen what you would like here, select Next.
This screen shows you a summary of all decisions that you have made for Program Installation. If you are satisfied with your selections, select Install. If not, select Back in order to move backward to a previous step, or Cancel to end the Program Installation.
You will then see a "progress dialog" that shows files being copied to your computer.
If you selected the Microsoft SQL Server Native Client Library to be installed, you will see the following product installer screen pop on top of the progress dialog, and the Native Client Library will be installed at this time.
When the Program Installation process has completed, you will then see the following screen.
You now have the option of running PA Server Monitor at this time.
If you have not run PA Server Monitor before, it is advisable at this time to review the next section, Program First Time Setup, before running PA Server Monitor.
The instructions that are provided here apply to the process that you must follow when you run PA Server Monitor for the first time.
First Time Setup is performed by PA Server Monitor when it is run for the very first time. First Time Setup is a Wizard type process with several screens that you enter data into as you move through the process.
Most of the screens that you will encounter in First Time Setup are available to you from the User Interface of PA Server Monitor, so you always have the opportunity to change and edit the configuration for your setup later and to add new servers for monitoring.
When you launch PA Server Monitor for the very first time, you are greeted with the following Welcome screen.
Press Yes to enter the Wizard. Press No to return to PA Server Monitor (you will have nothing configured if you do this and you will have to set up servers and other monitored devices manually.) If you press Yes you will see the next screen shown, Settings.
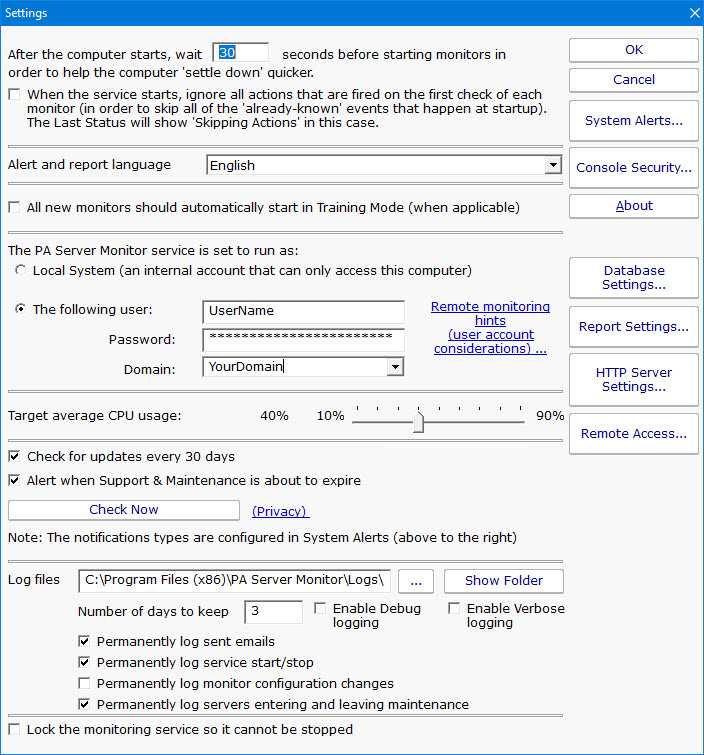
Refer to the help page Global Settings for information on these entries.
Select Ok when you are finished with this screen.
The next screen is Configure Email Notification.
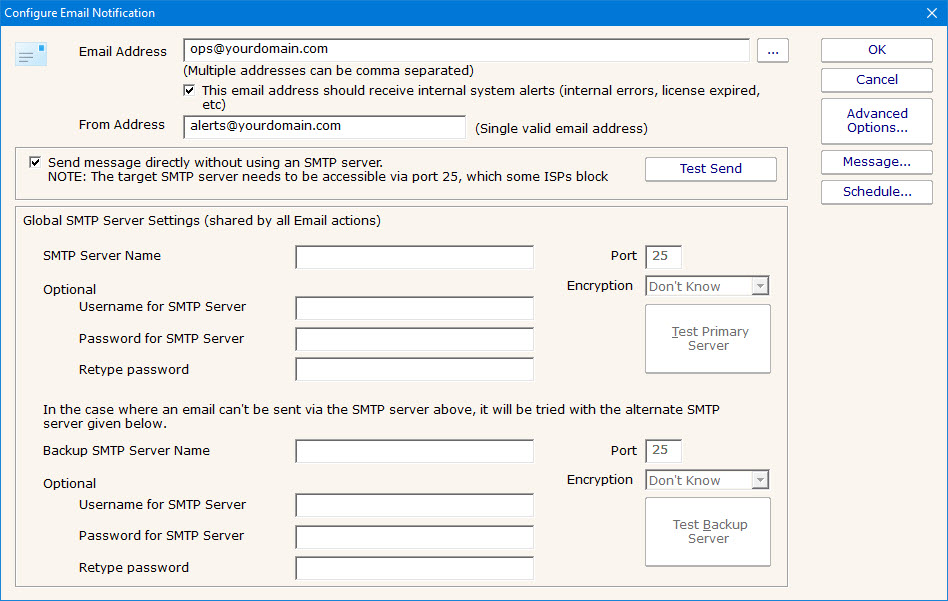
Refer to the help page Send SMTP E-Mail for directions. Select Ok when you are finished with the Configure Email Notification screen.
The next screen allows you to set the directory location and other options for the log files that PA Server Monitor writes to the disk drive.
Select Ok when you are finished with this screen.
Next you will see a message screen.
Select Ok to proceed.
The Smart Configuration screen allows you to set up many servers and devices in PA Server Monitor for monitoring. The program will create the most useful and most commonly used sets of monitors and actions for each server or device that you enter.
Refer to the help file entry labeled Smart Configuration for specific instructions for this screen.
After you have entered the necessary parameters, select the button labeled "Begin the Smart Config Process". You will then see the next screen.
The "Smart Config Action Selection" screen pops on top of the Smart Configuration screen. It allows you to customize the Actions that the Smart Configuration process will create for you for every Monitor and server.
This is really giving you a shortcut for quickly assigning actions to the monitors. The actions you check will get assigned to the monitors that are created.
When you have completed your selections, select Ok. You will next see a progress screen that pops on top of the Smart Configuration screen.
The screen labeled "Smart Config Process" shows you what PA Server Monitor is doing to set up the initial set of Monitors for your systems. When it is in process the centered button is labeled Cancel and you can stop the process by selecting it. When the process completes, you will see text as shown in the screen shot and the label on the button changes to Close. Select Close at this time in order to progress to the end of the Program First Time Setup process.
The next and final screen that will be displayed will contain helpful information for you, and confirms the end of the First Time Setup process.
Press Ok to continue. At this time, the Console of PA Server Monitor will be displayed, now configured with the Monitors and Actions that you have selected for the servers that you selected.