- Solutions
-
- File Server: Ransomware Protection
- File Server: File Copy
- File Server: Audit File Access
- File Server: Storage growth reporting
- Licensing/Pricing
- Contact
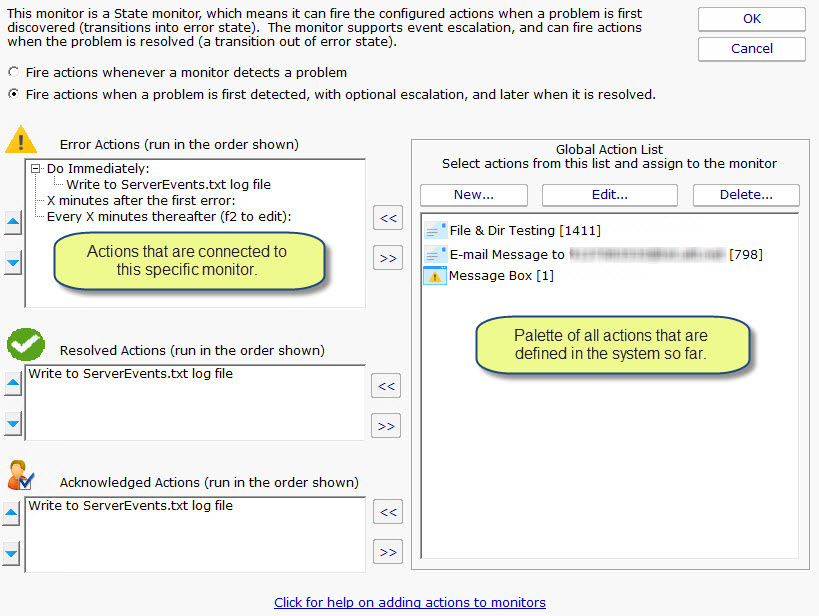
The Actions dialog is pictured below. (Depending on the features of the monitor being configured, the dialog may look slightly different than the one pictured below).
|
On the left are shown all of the actions that are attached to this specific monitor. When the monitor 'fires actions' it will run that list of actions in the order shown. You can change the order with the blue up and down arrow buttons. |
On the right is a list of all actions that are defined so far. These actions could be used by any monitor. If you need an action that isn't listed (for example another email action, or a Start Application action), click the "New ..." button above the list of global actions. You can edit actions in this list, and changes made will be reflected in every monitor that is using that action. |
To add (or attach) an action to a monitor, simply select the action in the global list on the right, and press the green
 button to move the action to the left
monitor-specific list, to the Do Immediately node. (Other nodes may be shown for monitors that support event escalation)
button to move the action to the left
monitor-specific list, to the Do Immediately node. (Other nodes may be shown for monitors that support event escalation)
Some monitors see discrete events -- a file is accessed, an event is written to the Event Log, etc. Others see conditions -- disk space is low, ping response is too slow, etc.
The following describes how State and Event monitors differ.
State monitors can be configured to act like Event monitors, meaning you can choose to be notified every time an error state is detected. This is what the radio buttons near the top do.
With these differences in mind, the dialog above shows the action configuration dialog for a State monitor. Only state monitors support event escalation.