We’ve talked previously about some of the features newly introduced with Windows Server 2012. In this article we’ll discuss Storage Spaces, a feature that allows you to provision storage to remove servers by creating storage pools. With Storage Spaces you can utilize physical inexpensive disks that once configured react just like a SAN (storage area network) device. In small enterprises that don’t require dedicated devices for storage space or high I/O operations, Storage Spaces provides a good alternative in achieving similar results.
To configure Storage Spaces you’ll need one or multiple unpartitioned physical disks (two for mirroring, three for mirroring with parity). Note that this technology offers support for SCSI, SATA, SAS and USB so it will suit you well for most configurations. Disks may be provided either externally or internally and can even be used in JBOD configuration. Storage spaces is a feature that will be installed by default on all Windows Server 2012 machines because it’s part of the File and Storage Services role, so you’ll not need to cover the installation part.
We’ll continue by installing and configuring a storage pool and then create a VHD that can be used by other machines. Note that in the context of SAN, a VHD is referred to as a LUN (Logical Unit Number). When talking about Storage Spaces we can use these terms interchangeably because they basically offer similar functionalities. Note that disks initialized for Storage Space will use the GPT partition style .
.
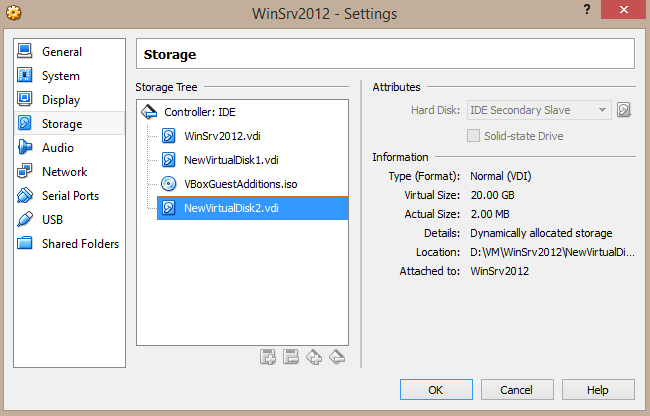
I’ve created a testing VM on my VirtualBox environment and I’ve attached two extra disks to be able to show you how to configure Storage Spaces.
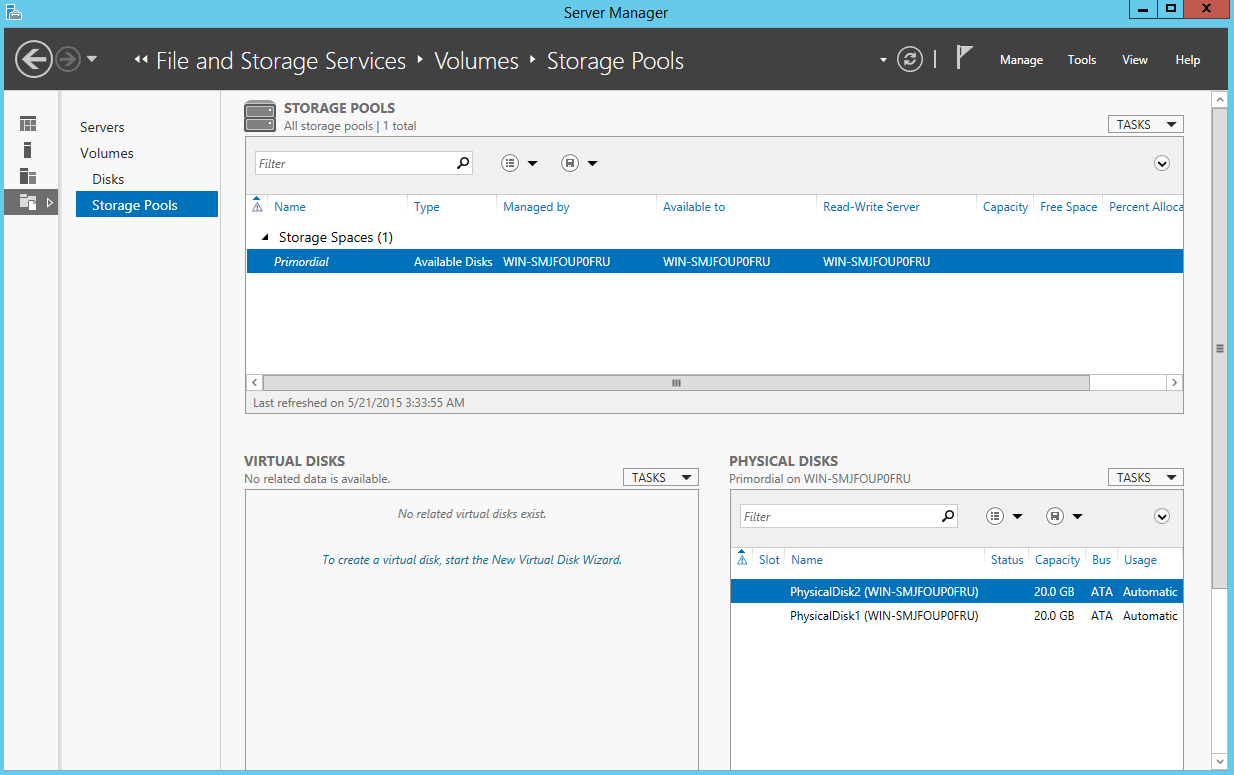
Once you login on the machine, open the Server Manager console and navigate to the File and Storage Services/Storage Pools Section:

In the bottom right section of the window, you’ll see the physical disks attached on the machine. Note that in order to be able to create a storage pool, the disk must be at least 10 GB in size. All disks will be automatically added to the Primordial pool which contains all storage available on the server from which you can create storage pools. Use Ctrl to select multiple disks, right click and select Now Storage Pool or use the Tasks menu in the upper right corner of the panel. When the wizard starts, enter a name for the storage pool and then make sure that the desired disks are selected:
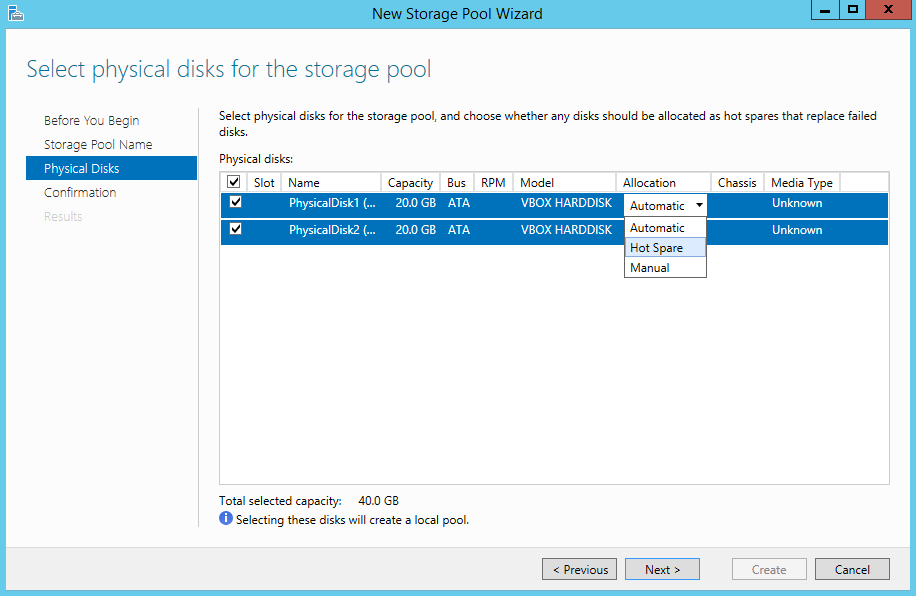
There are three options available in the allocation section:
- • Automatic – disk drives capacity is configured automatically
- • Hot Spare – the disk will not be part of the active pool, it will act as a replacement if one of the active disks fails. A hot spare will automatically be activated if one physical disk is not available anymore
- • Manual – the admin will configure manually the storage allocation
You can also use Powershell to configure Storage Pools much faster by using the New-StoragePool cmdlet just like in the following example:
New-StoragePool –FriendlyName MyNewPool –StorageSubsystemFriendlyName “Storage Spaces*” –PhysicalDisks (Get-PhysicalDisk PhysicalDisk1, PhysicalDisk2)
With the Get-StoragePool -IsPrimordial $true | Get-PhysicalDisk | Where-Object CanPool -eq $True you can get the physical disks available in the Primordial pool.
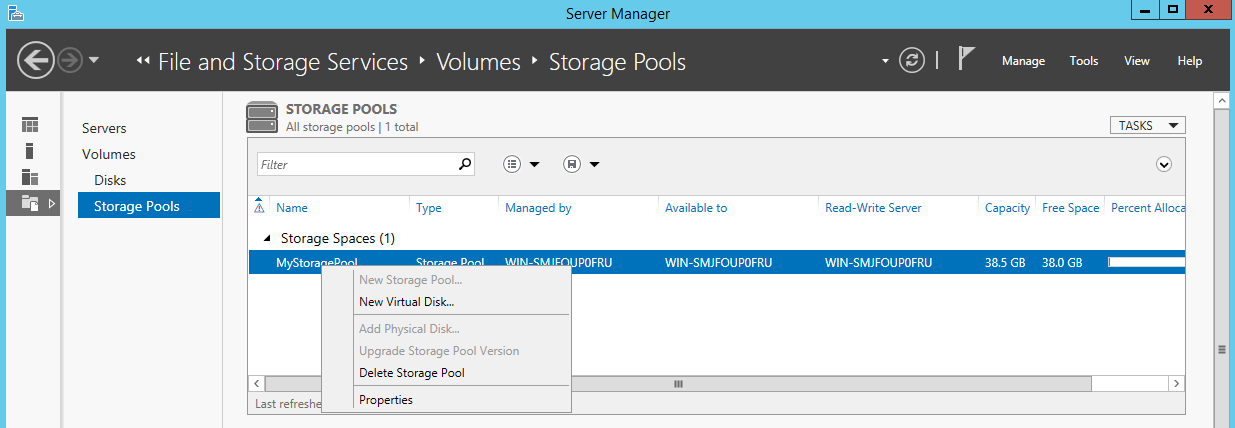
Once the storage pool has been created, we can create a virtual disk by right clicking on the pool and selecting New Virtual Disk:
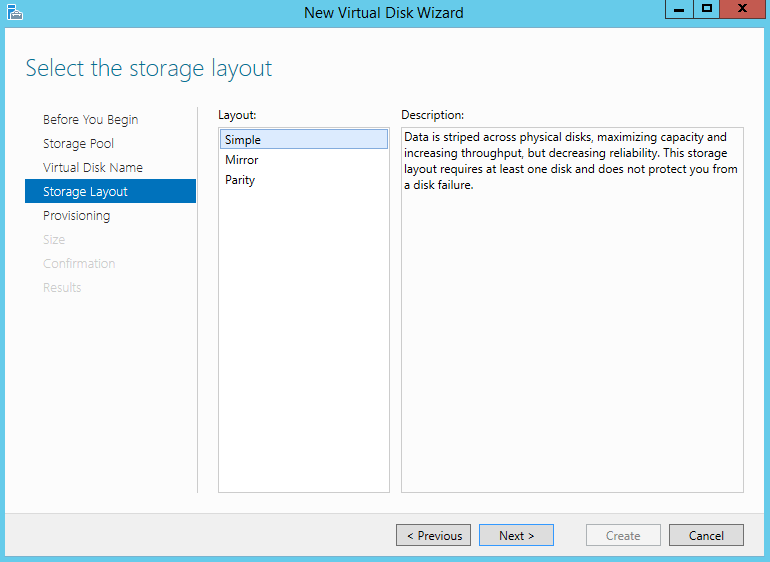
Choose the storage pool that will host the VHD, set the name and description for your new VHD and set the provisioning method that you desire, there are three options available:
- • Simple
- • Mirror
- • Parity
If you want to find out more about SAN technologies available with Windows Server and more about provisioning method, check out this article.
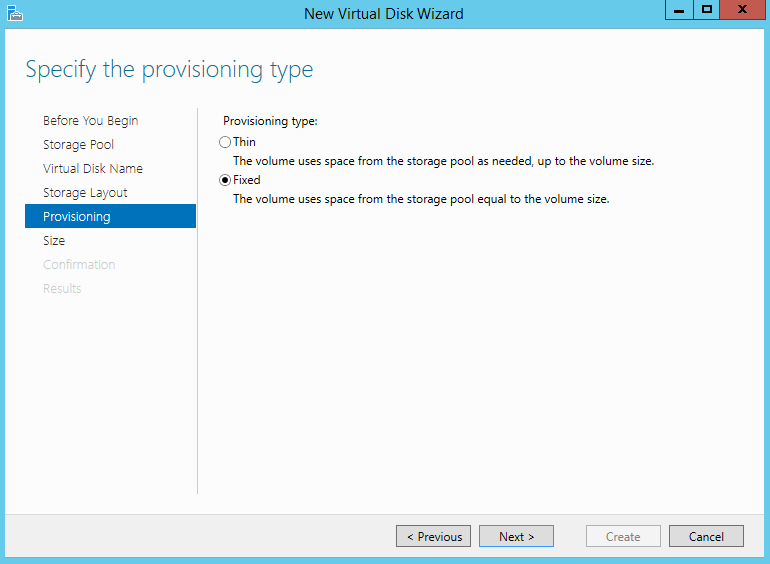
In the provisioning tab select the type that suits best for your environment:
- • Thin – uses storage space from the pool as written on the VHD
- • Fixed – allocates all disk space from the beginning
All that’s left to do is to set the VHD size and finish the configuration. Once the VHD is ready, it will appear in the Virtual Disks section on the selected Storage Pool. Now you can use this VHD and allocate it to a server within your network:
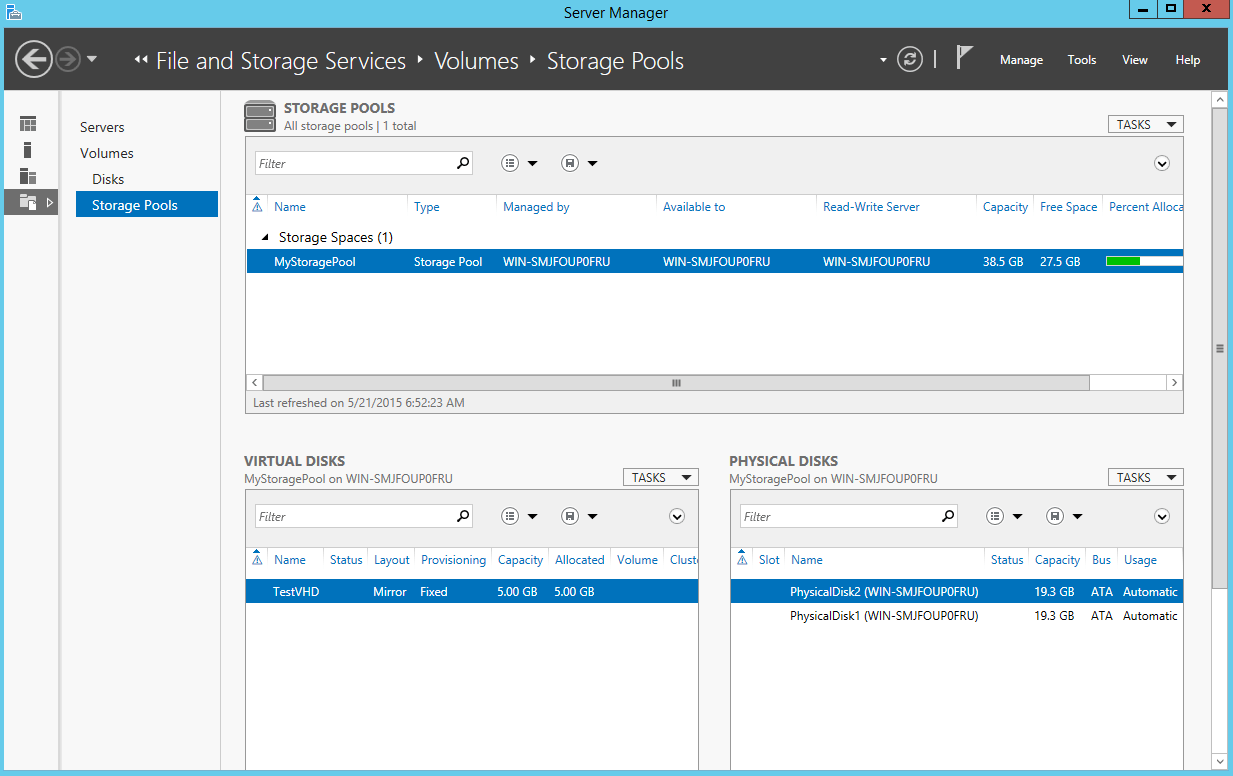
That’s a about it for this article folks, as you can see, Storage Pools VHDs can be easily configured with Windows Server 2012 and really offers a fast and cheap solution to provide storage to your network servers. Because this feature is included in the Windows Server 2012 Edition by default, you only have to purchase the necessary license and physical disks rather than buy a SAN device thus seriously decreasing costs. Hope you’ve enjoyed this article and if so, please rate it in our dedicated section.