DFS (Distributed File System) is a Windows Server feature which allows System Administrators to create a single namespace to provide a replicated sharing infrastructure across the network. Large enterprises that have multiple offices interconnected must be able to allow their employees to access documents easily. This means that clients must connect to desired resources from any part of the network. It’s hard to remember each share folder location when there are multiple servers hosting different data. Microsoft implemented DFS to allow servers to “organize many distributed SMB file shares into a distributed file system” (Wikipedia).
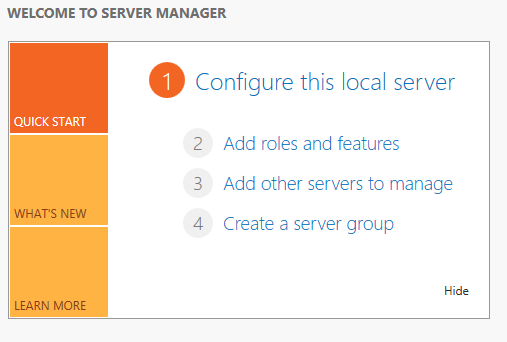
In this article I will show you how to implement DFS in your Windows Infrastructure. Note that for the following demonstrations I will be using a Windows Server 2012 Virtual Machine. Similar settings are applied for older Windows Server versions. Before we can configure DFS, we’ll need to install the File Services server role. Open the Server Manager console and click on Add Roles and features button:

In the Sever Roles section, expand File and Storage Services/ File and iSCSI Services and select DFS Namespaces and DFS Replication:

Now press next until the installation begins. Wait for the wizard to finish installing all components and then close the window.
Distributed File System can be configured using the DFS Management console. You can find the console in the Tools section in Server Manager:

We’ll need to create a namespace that will contain the share folders. In the DFS Management console, right click the Namespaces section and select New Namespace:

You’ll need to select the server that will host the namespace, note that a namespace can contain share folders from multiple servers. You can later add servers to this namespace to create a failover infrastructure:

In the next section type in the name for the namespace:

Further settings can be configured if you press the Edit button. You can configure the local path and permissions for the share folder. There are several sharing permissions options available but, you can also use custom permissions by pressing the Customize button:

There are two types of namespaces that you can configure on a Windows Server:
Domain-based namespace : used within Active Directory domains, the namespace is stored in the namespace servers and AD. You can enable the Windows Serer 2008 mode which offers increased scalability and access-based enumeration. Use this option whenever possible.
Stand-alone namespace : is implemented on a single server but, does not offer the same advantages as a domain-based namespace:

Review all the settings configured so far and create the namespace. Once the success status is received, the namespace can be used and access from any part of the network:

The newly created namespace will appear under the namespaces tab. If you click on it and navigate to the Namespace Servers section you can view all servers configured to host the namespace:

From the right section of the pane you can click on the Add Namespace Server button and add one or multiple machines that will host the namespace. For redundancy, I recommend using at least two servers:

You can now create folders that will be available for all network computers. It all depends on how you design the folder structure to provide a consistent and easy to use DFS infrastructure. In the DFS console press the New Folder button from the right section of the pane. Type in the Name of the Folder and add the share folders that will appear under this node in the namespace structure. For this demonstration, I’ve added a folder called “IT” from one server and another folder “HR” from my second machine:

After you create a folder using the DFS console and set the appropriate permissions, you can access the share using Windows Explorer or the run prompt by typing in the UNC

That’s about it for the DFS implementation; there are a couple of things we further need to discuss about DFS Replication and how to configure it using CMD or scripts. In the next article we will cover all these DFS components and hopefully, in the end, you will have an overall picture of this great tool. Remember that any questions you may have can be submitted in our comments section and I will try to respond as soon as possible. Wish you all the best and stay tuned for following articles.