- Licensing / Pricing
- Satisfied Customers
- Resellers
- Contact
 PA Server
Monitor
PA Server
Monitor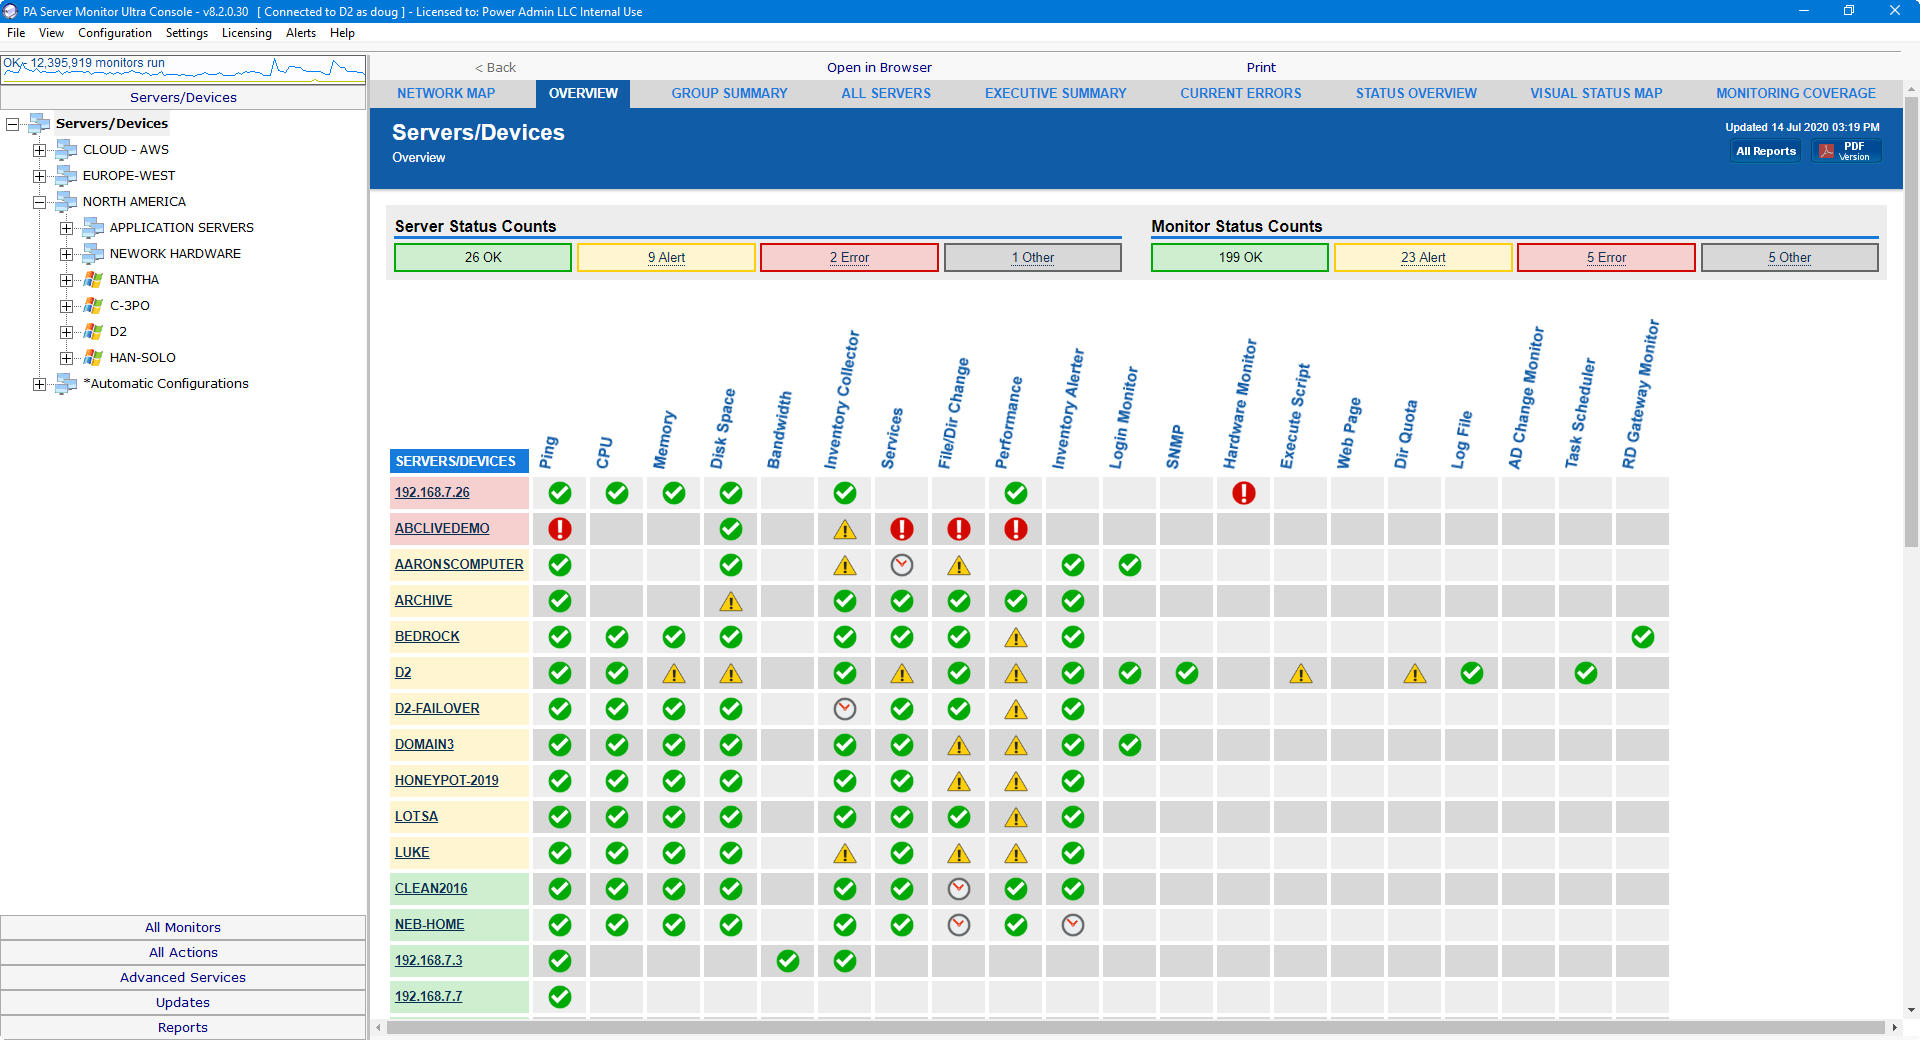
Quick to setup. Monitor server information (Event Logs, SNMP values, CPU, memory and network counters, running services, ping response time, disk space, and much more), even across the Internet. Many alerts and actions, plus rich reporting.
 PA File
Sight
PA File
Sight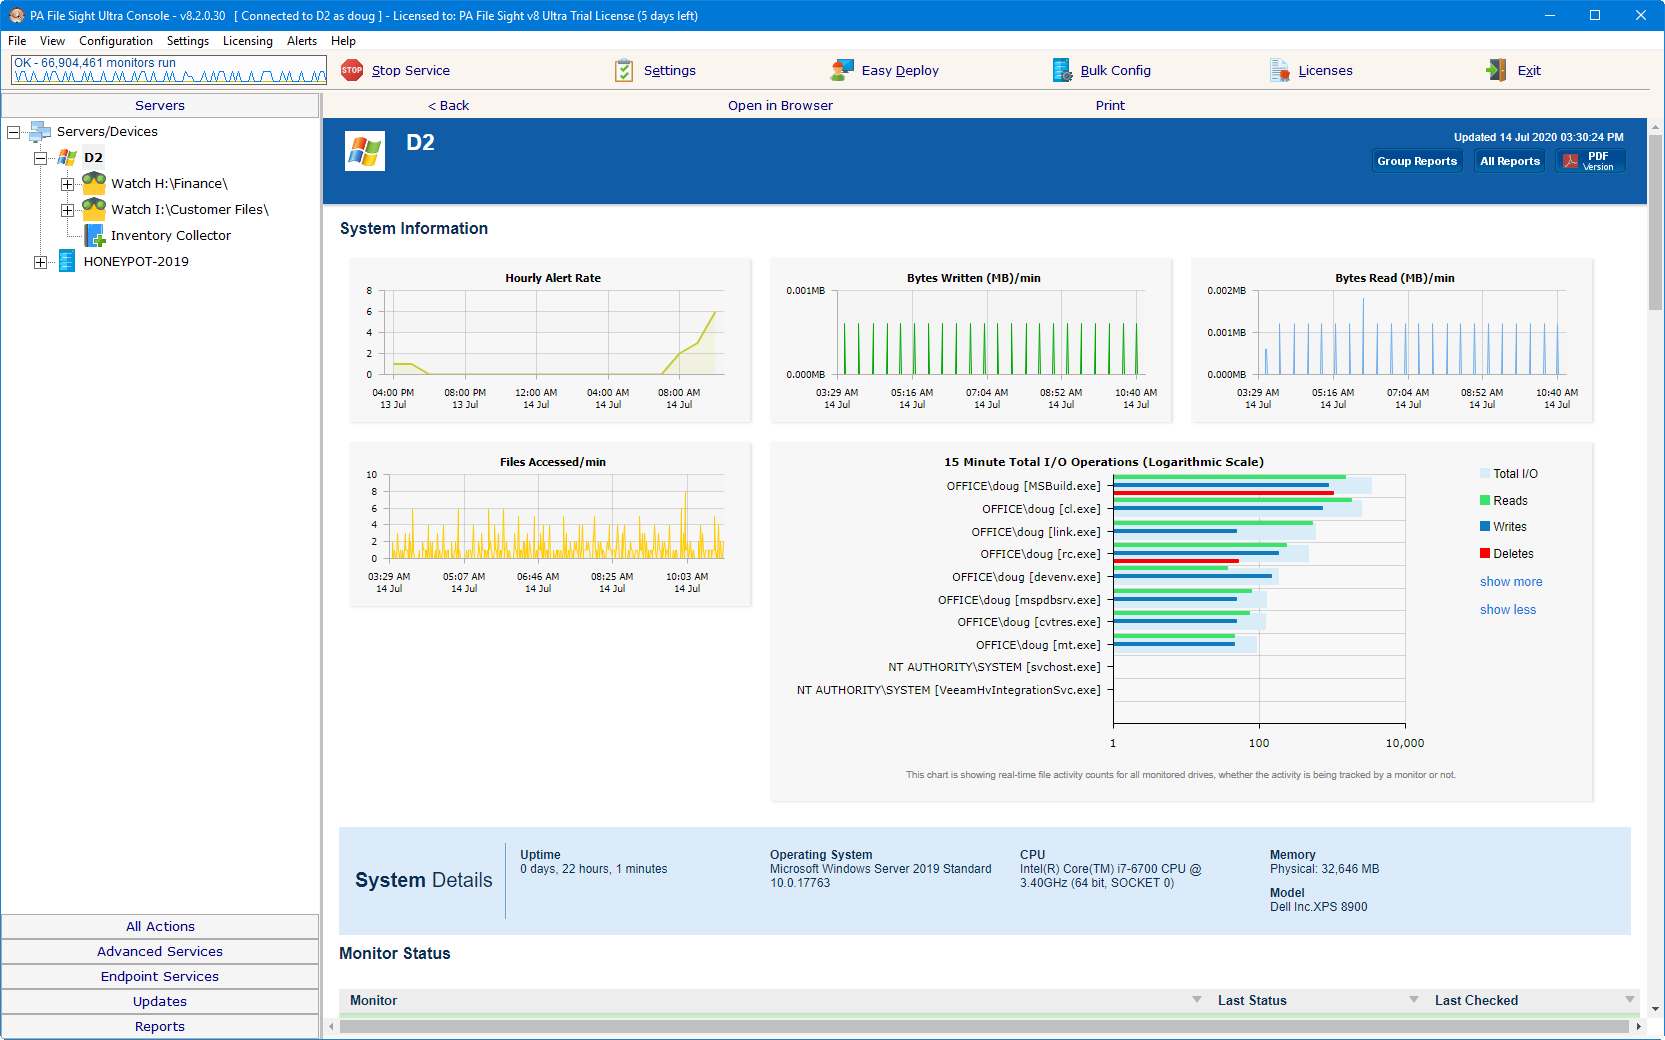
Track who accesses, who deletes or creates files on a server. Full alerting and reporting. Reports for powerful file access auditing.
 PA Storage Monitor
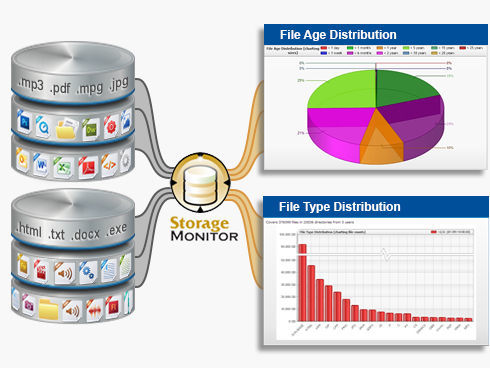
Track every file on a file system (file dates, sizes, owner, etc). Rich reporting about file owners, file types, file ages, etc. Also typical Disk Space monitors, etc.